
photo by Charlie Borst
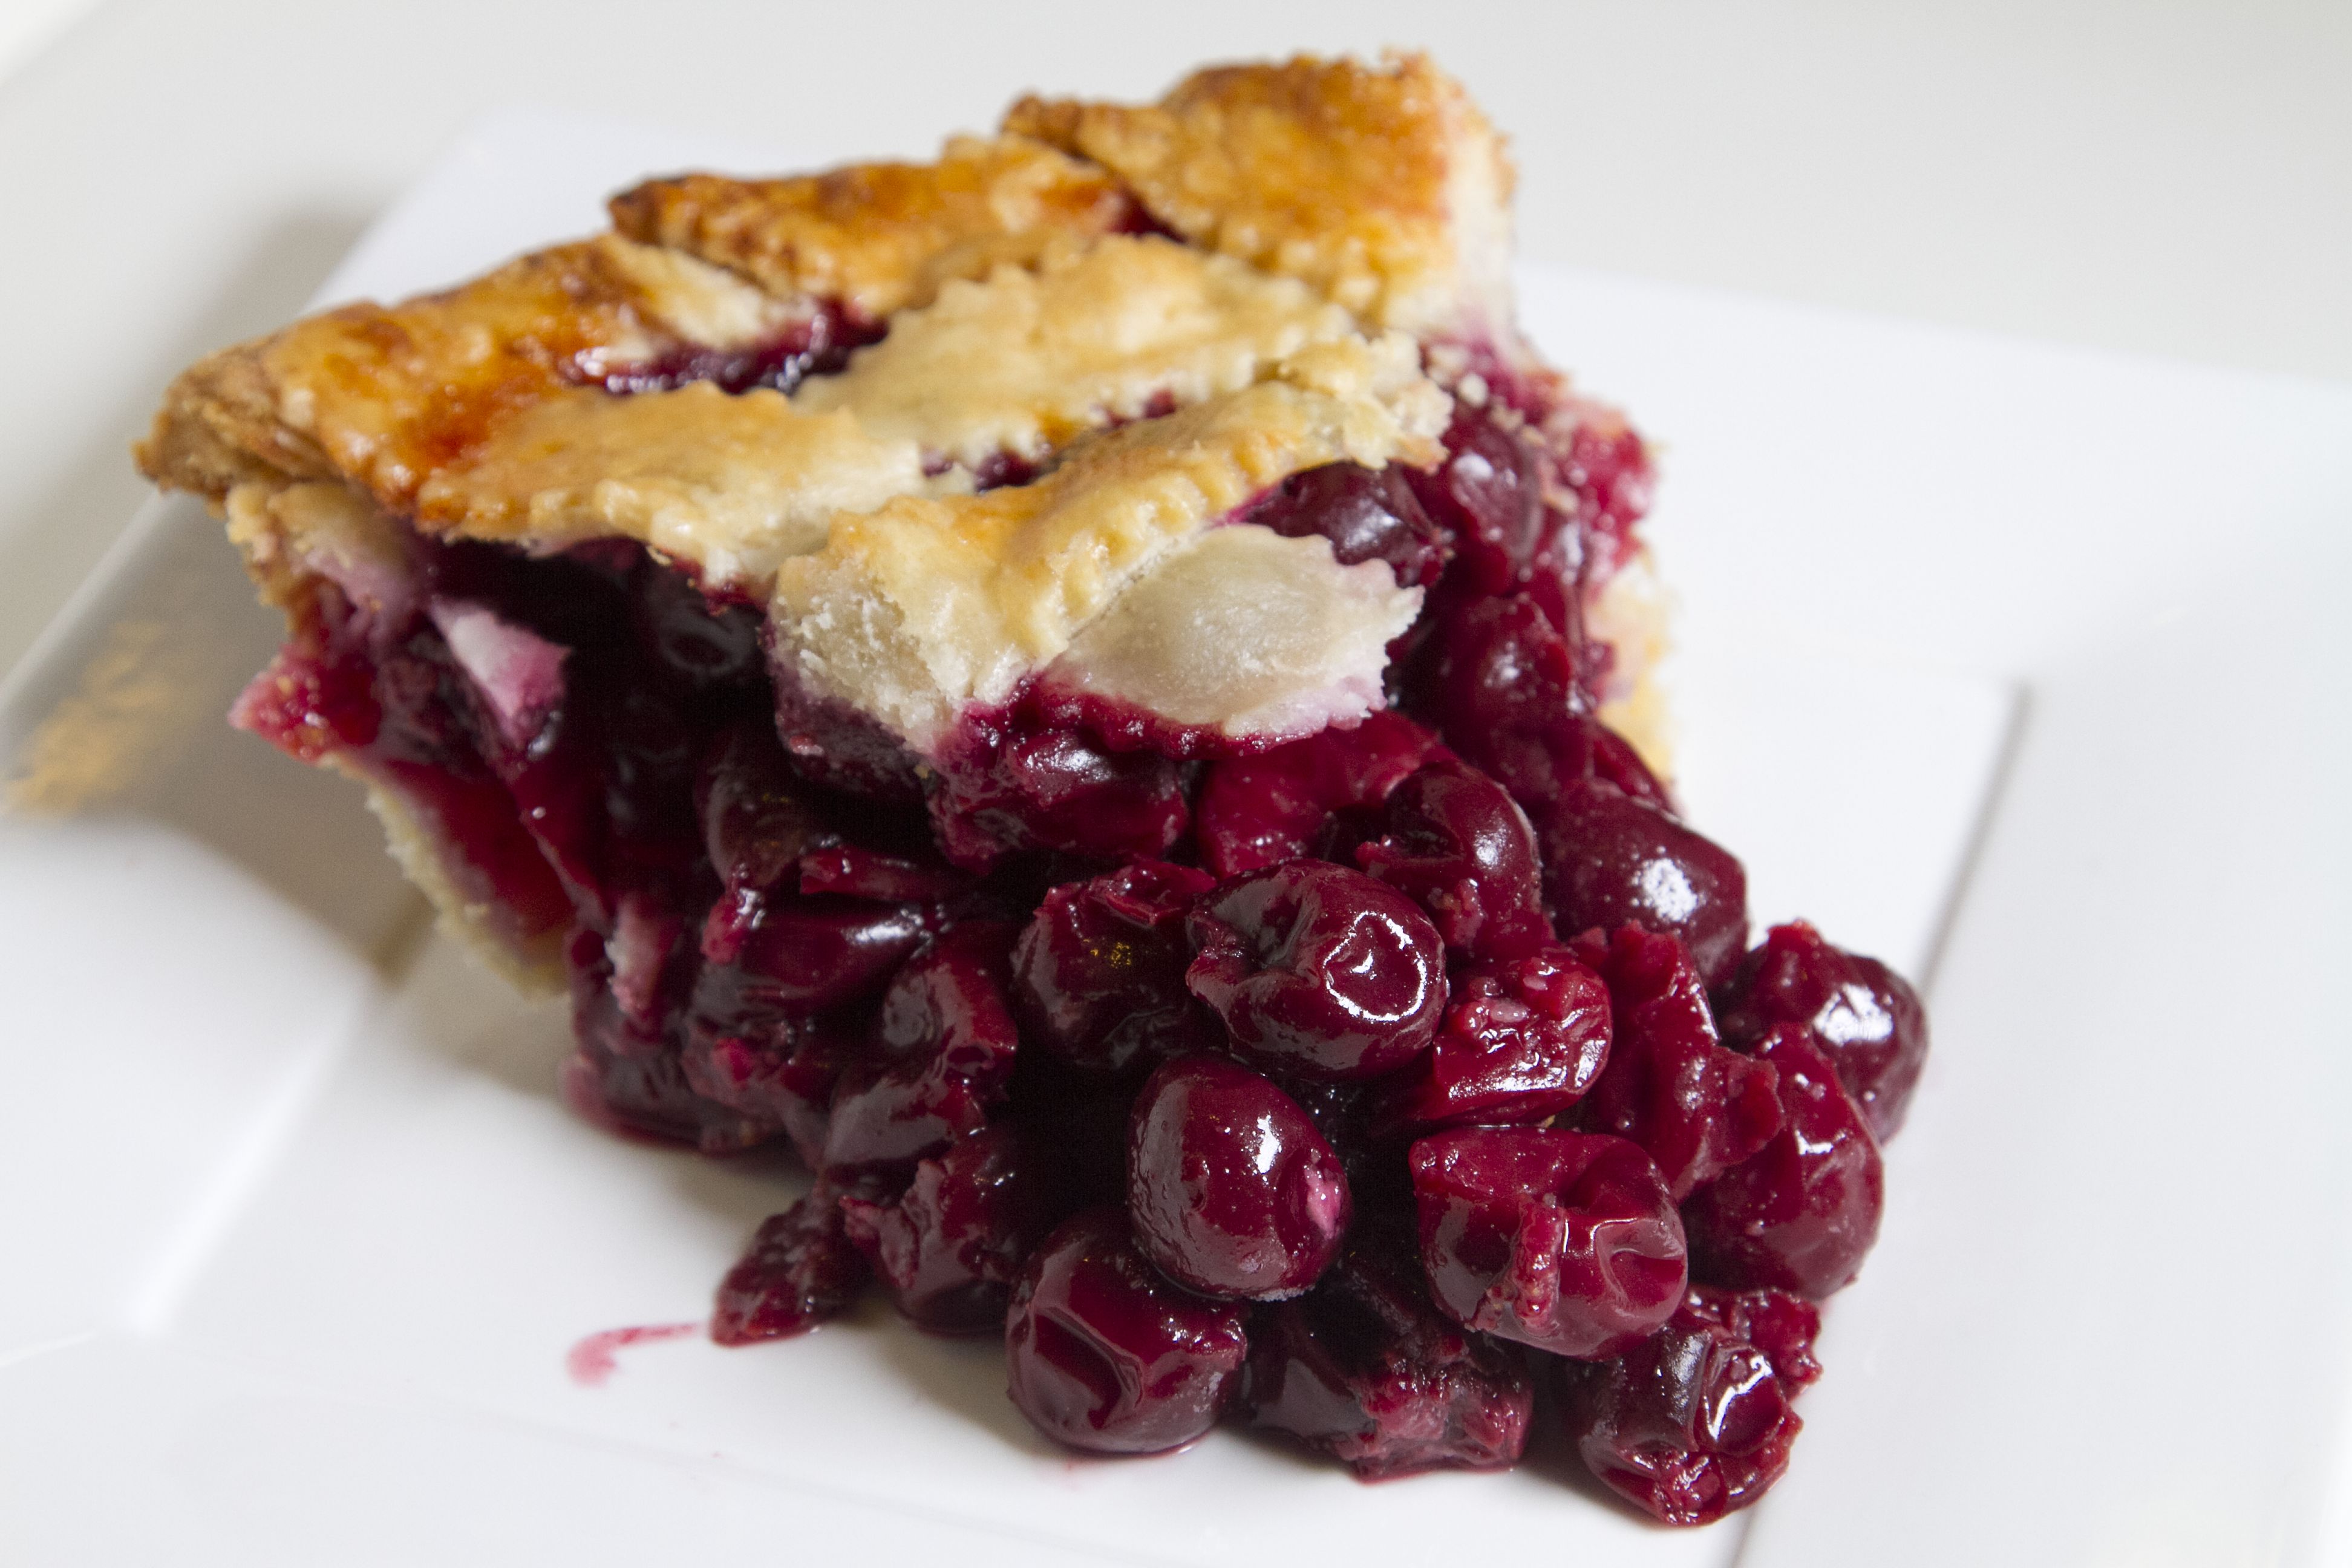
For some reason I can’t quite fathom, cherry pie has become CurvyMama’s signature pie. Don’t get me wrong: I adore a nice tart cherry pie, and I love it when other people adore one, too. I love making my cherry pie and serving it. Maybe you associate it with CurvyMama Pies because it looks so damn sexy in photos on the homepage of my website. Maybe it’s the lattice crust, or the deep-red oozy cherries, that makes people feel suddenly flirtatious.
But for whatever reason, cherry pie has become something of a subtitle for me; in fact, I’ve got one in the oven right now. While I’ve blogged about it here before, experimenting with shiny glazes and such, I wanted to update the record with the recipe I use day in and day out, to draw sighs of happiness and exclamations of gorgeosity. (Okay, so that’s not a real word. I don’t mind.)
Here’s how we do it:
Place the well-drained cherries in a large bowl. Have the other filling ingredients nearby, but don’t add them yet.
Roll out one disk of dough for your bottom crust. Ease it into a 9-inch pie pan and trim the edges. Put it in the refrigerator.
Roll out the second disk of dough for the top crust. With a fluted pastry cutter, cut the dough into 12 to 14 strips of about 3/4 of an inch wide.
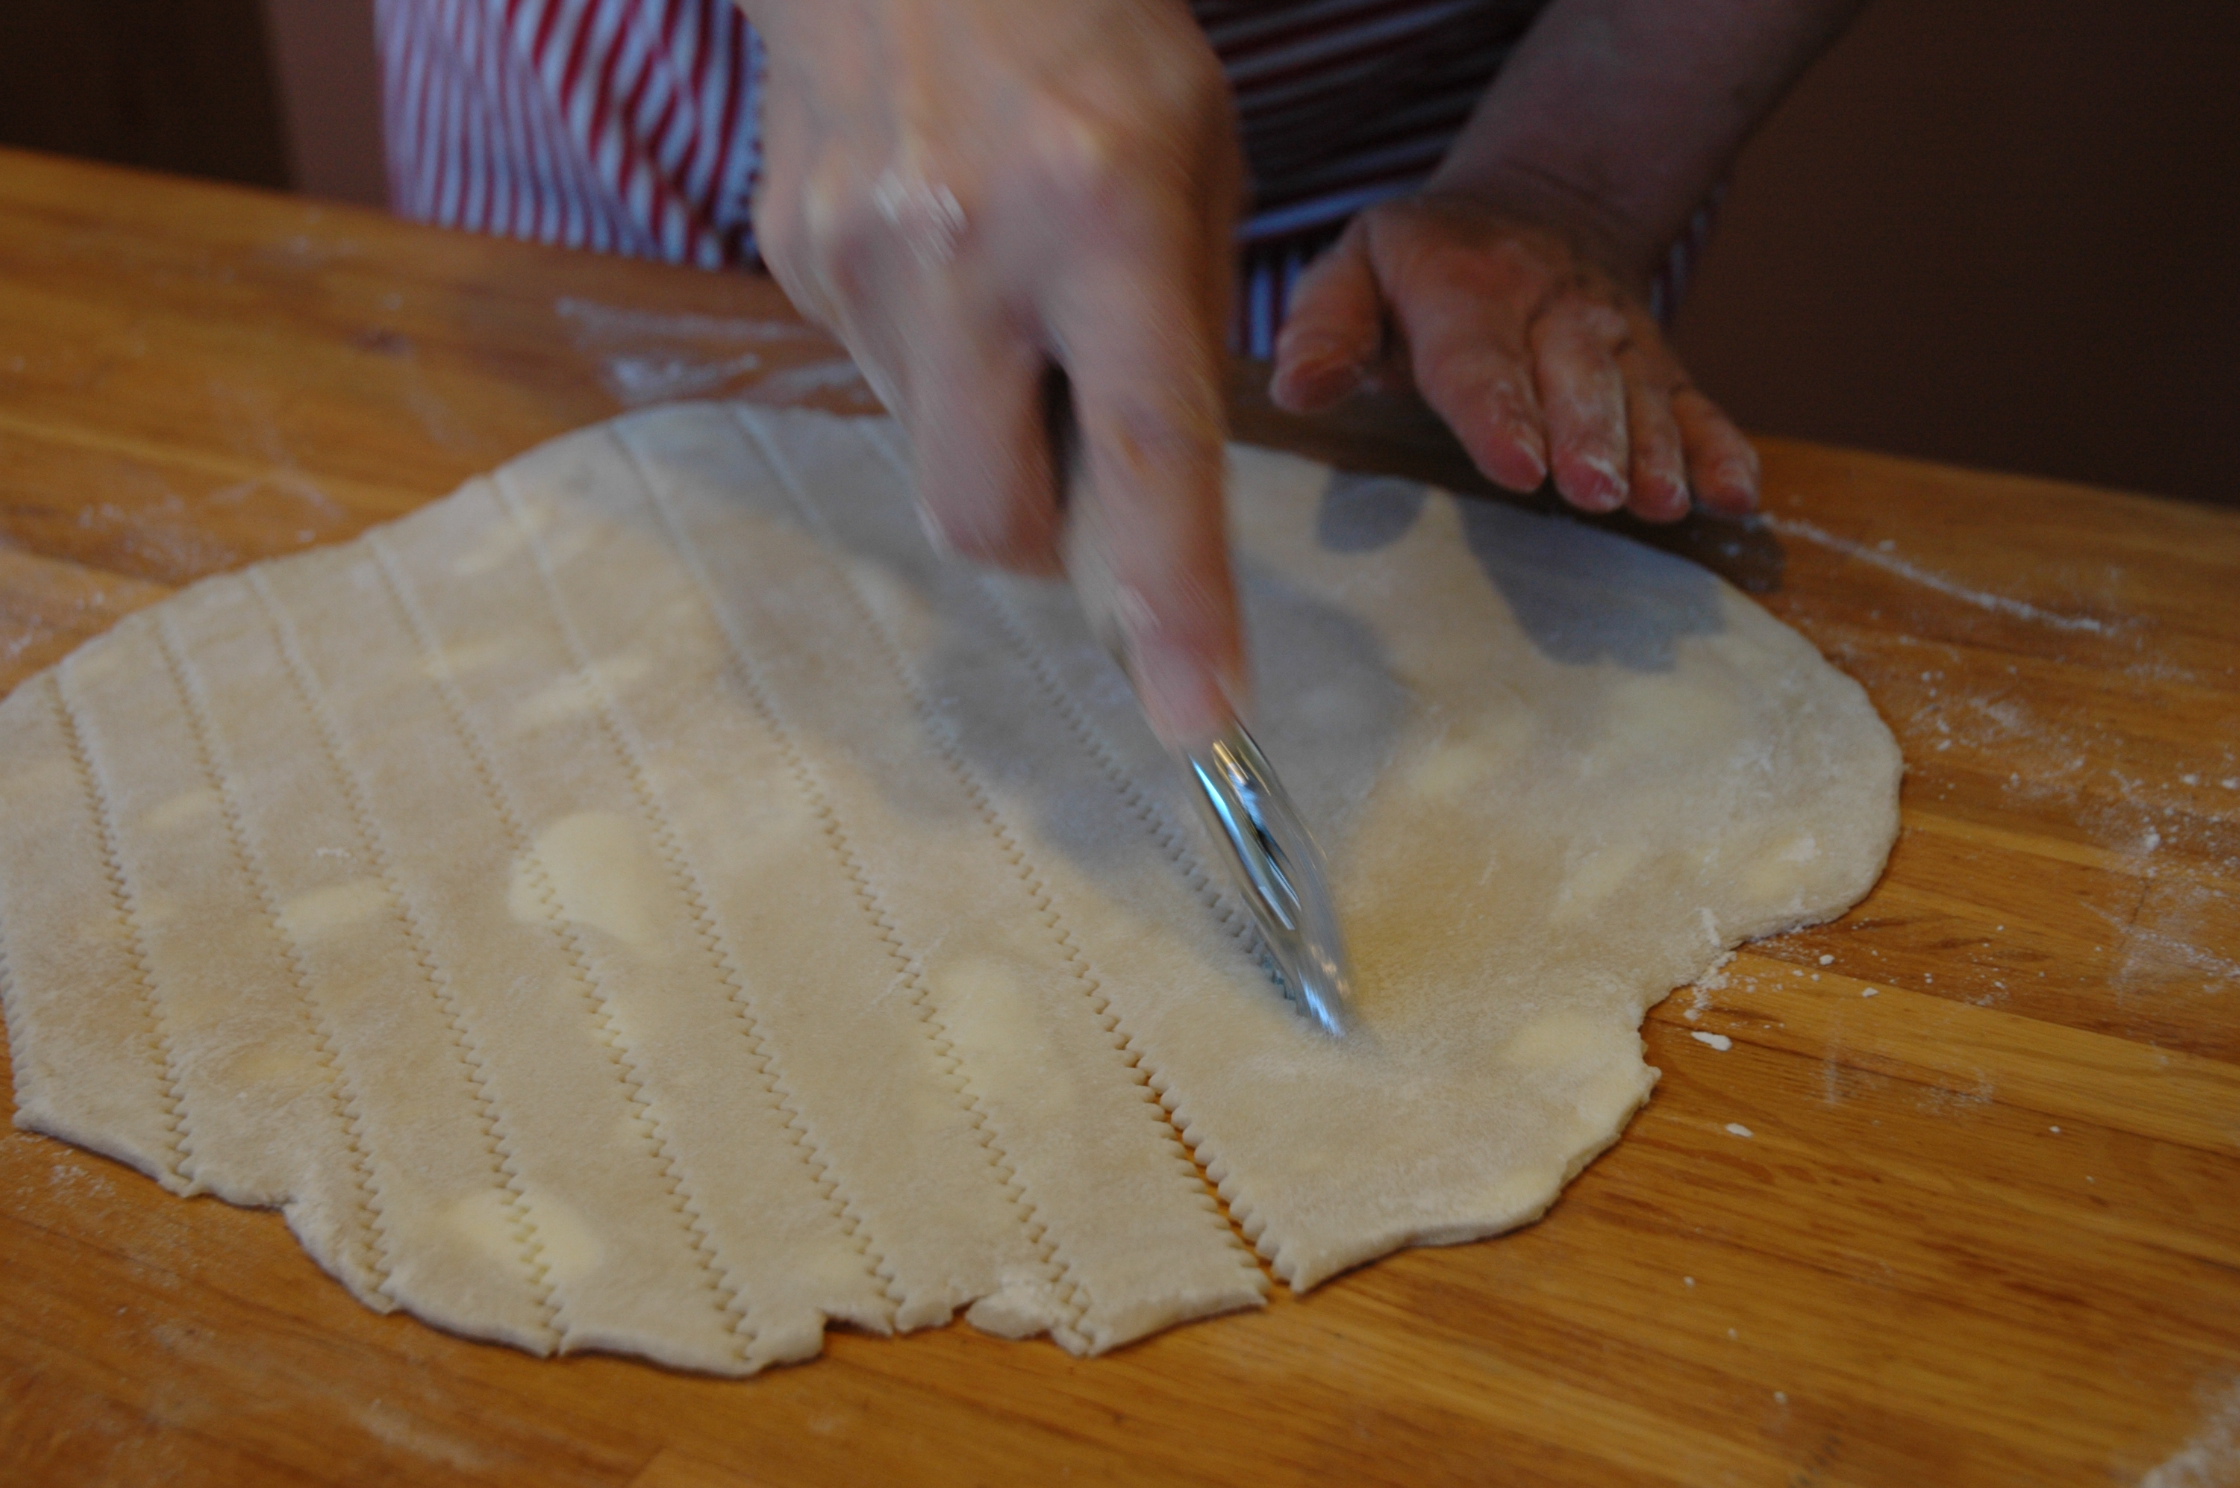
Lay the strips on a dish or a narrow baking sheet and chill them in the refrigerator.
Once the dough has been chilled about 15 minutes, you’re ready to finish the cherry filling. Add the extract, sugar, salt and tapioca flour and stir to combine.
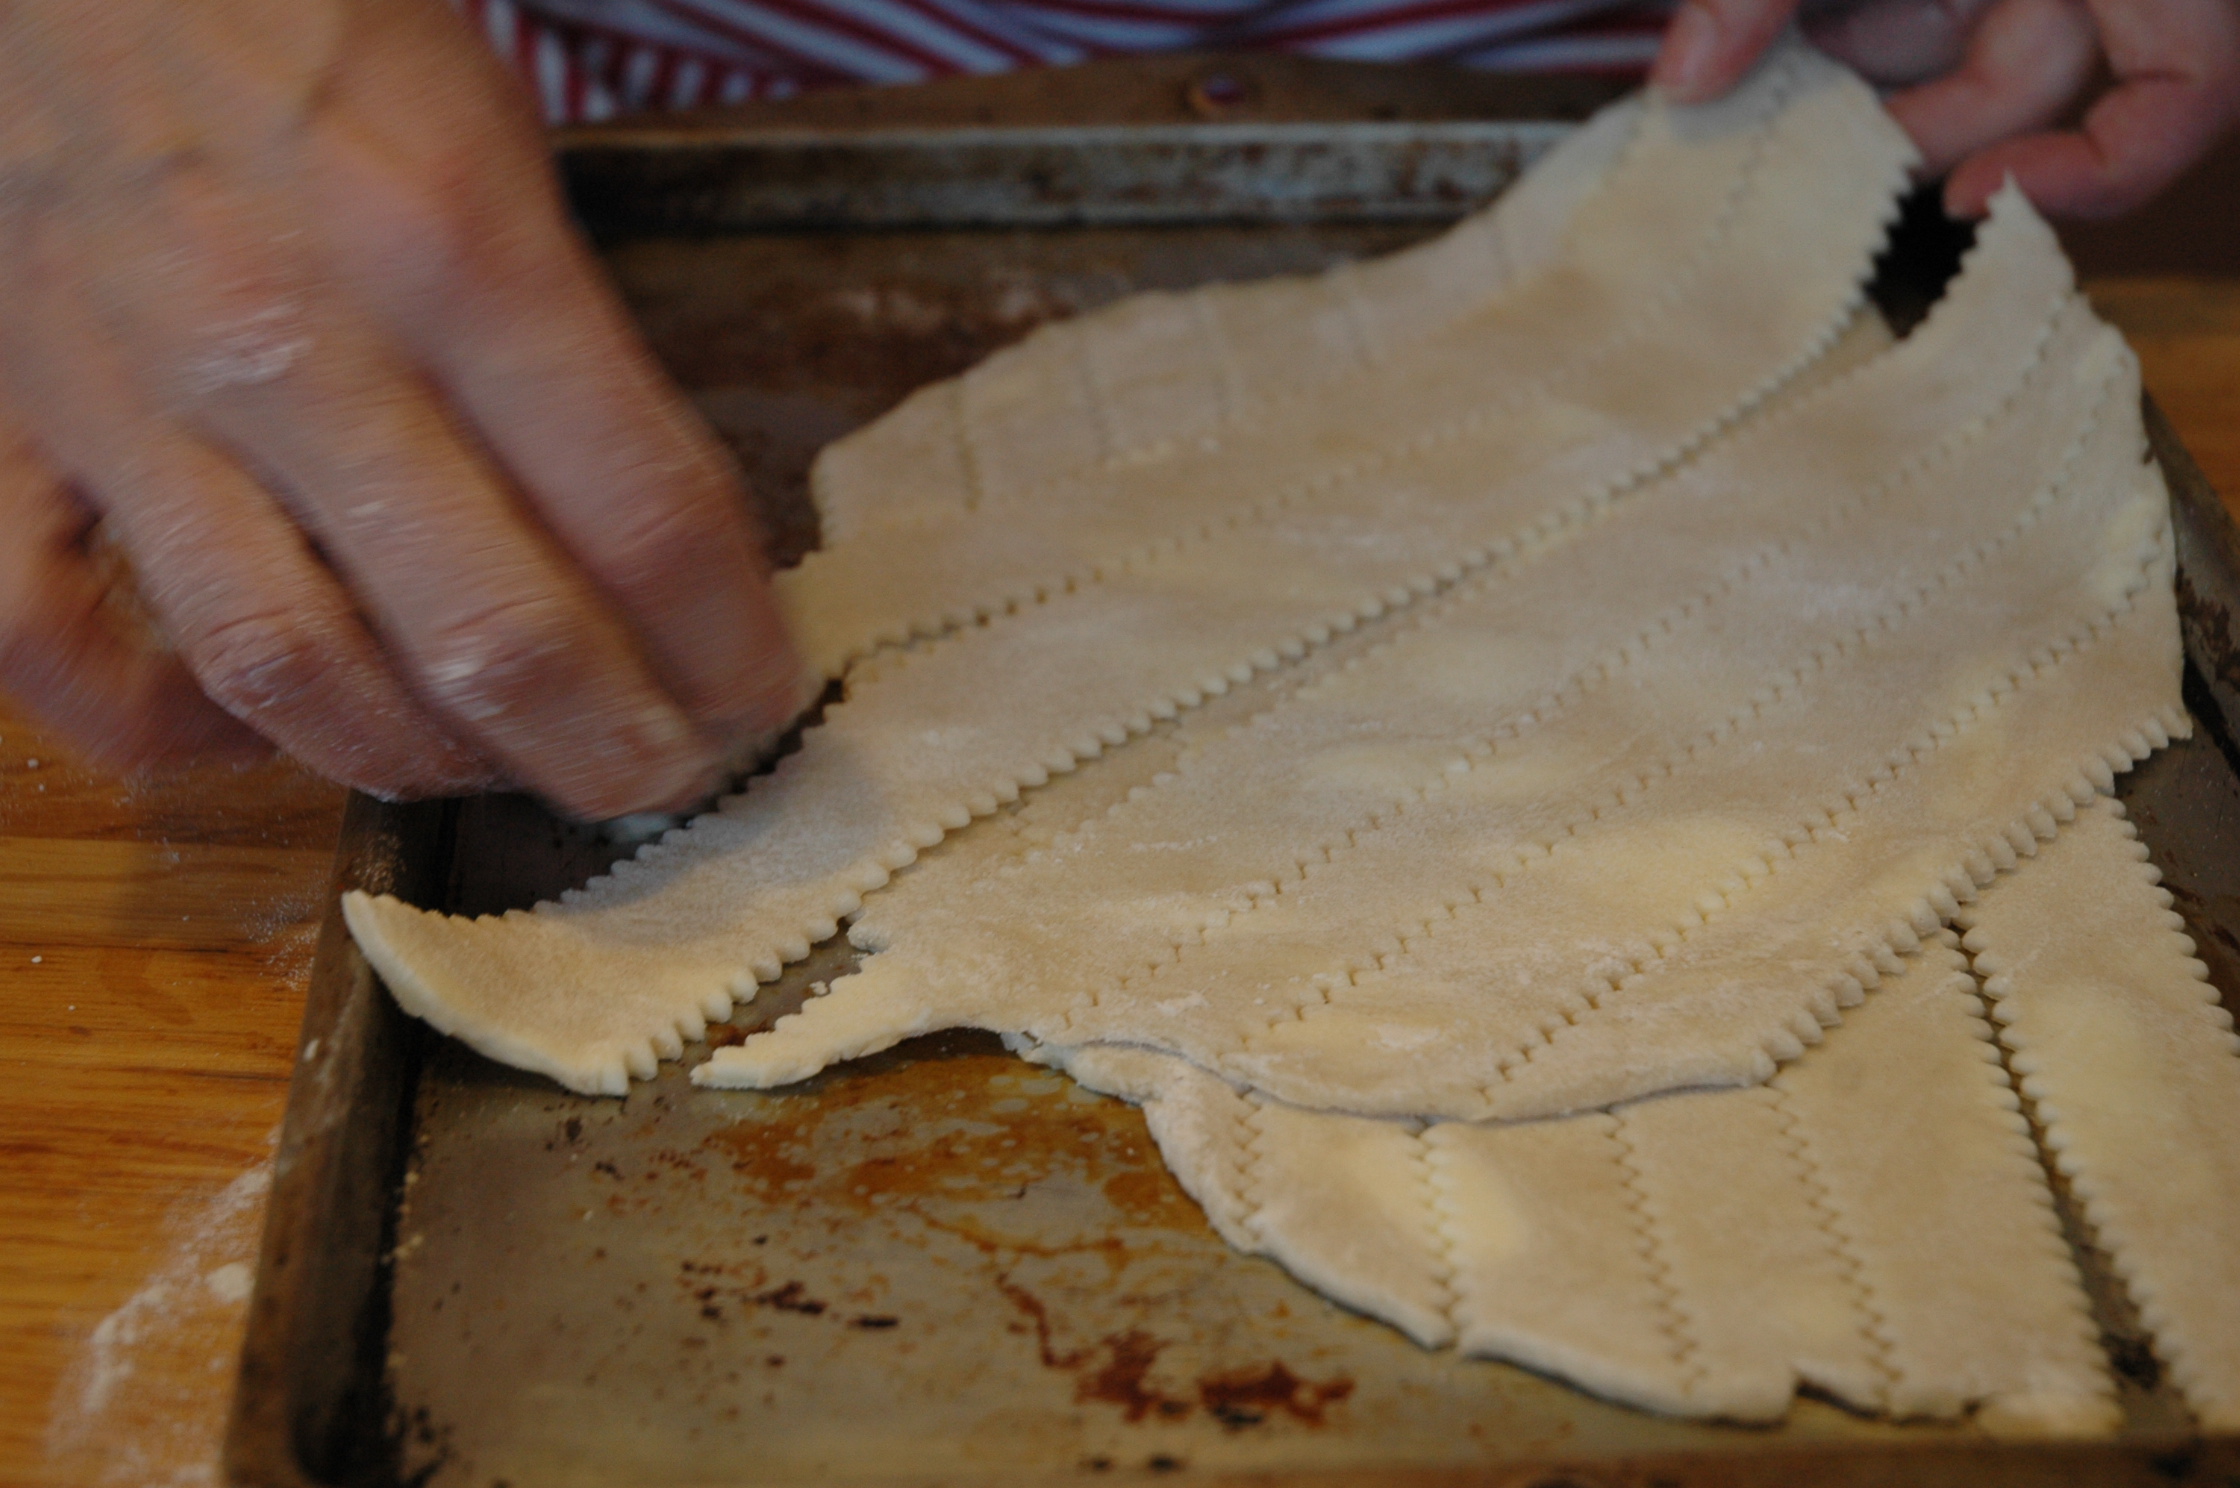
Pour the cherry filling into the bottom crust. Arrange half the dough strips in parallel on top of the filling, letting the ends fall over the edges, and using the longest strips across the center of the pie.
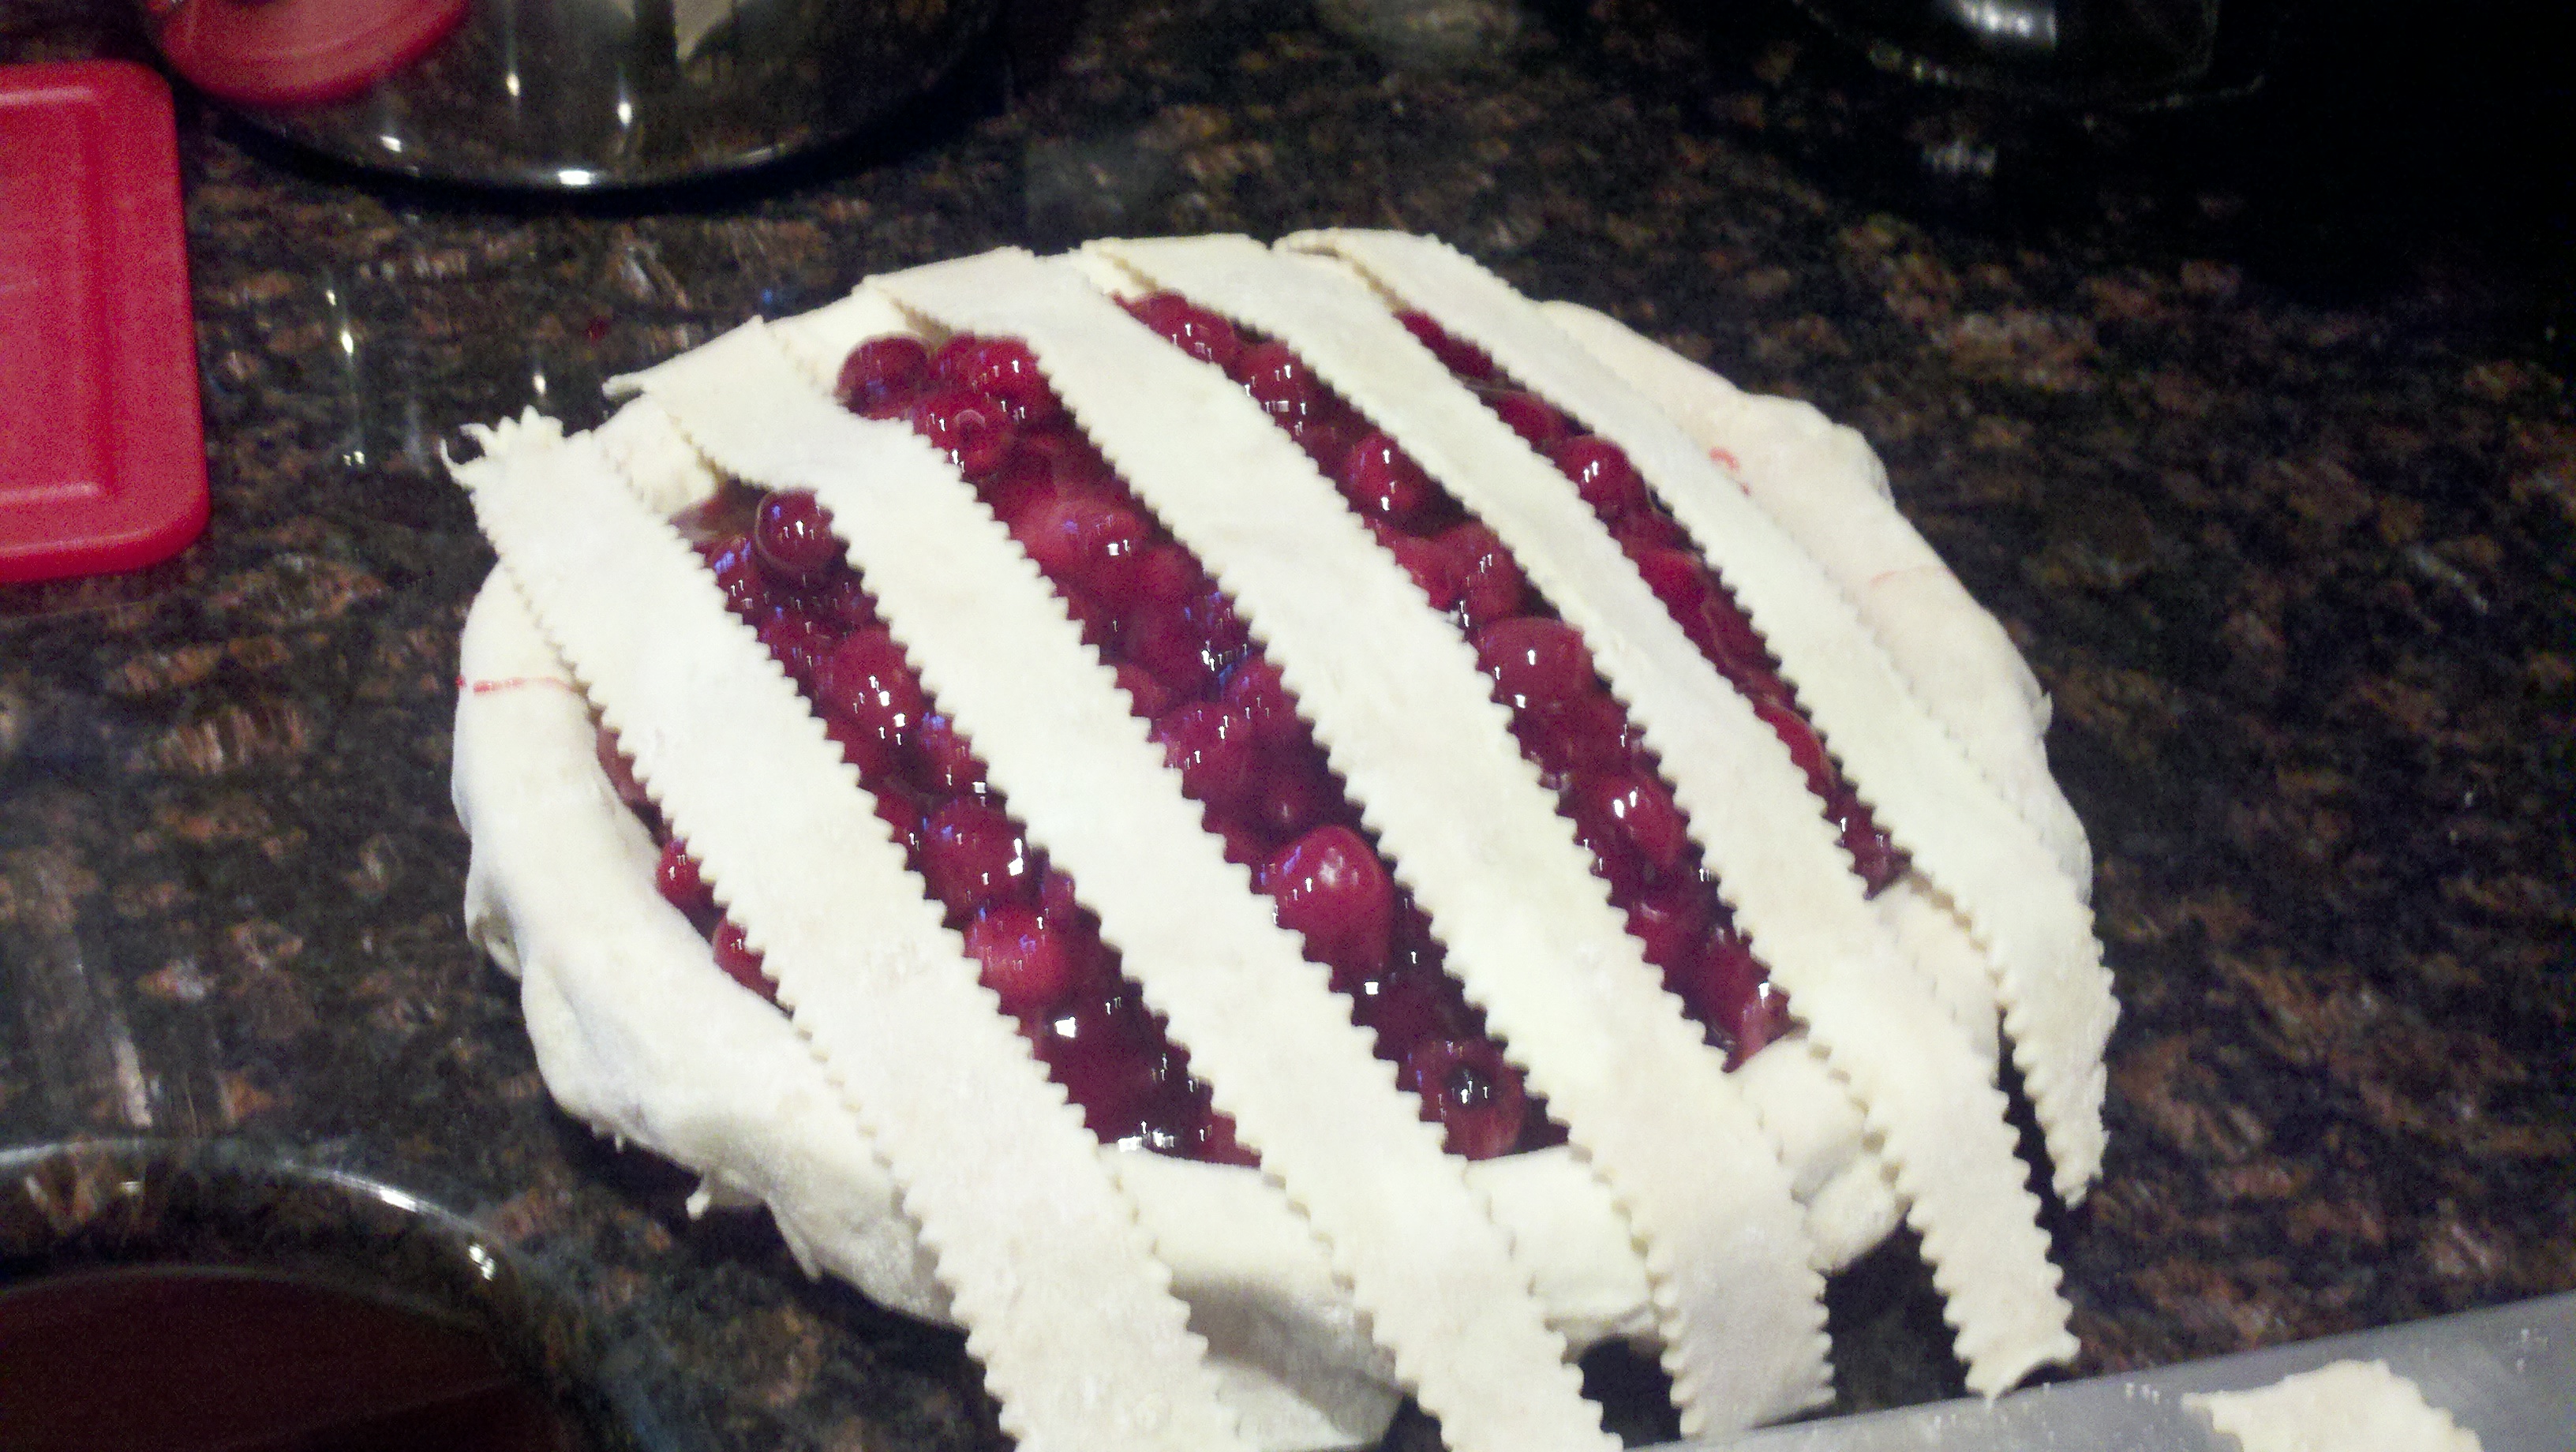
Fold back every other strip of dough (I’ll call this set #1).
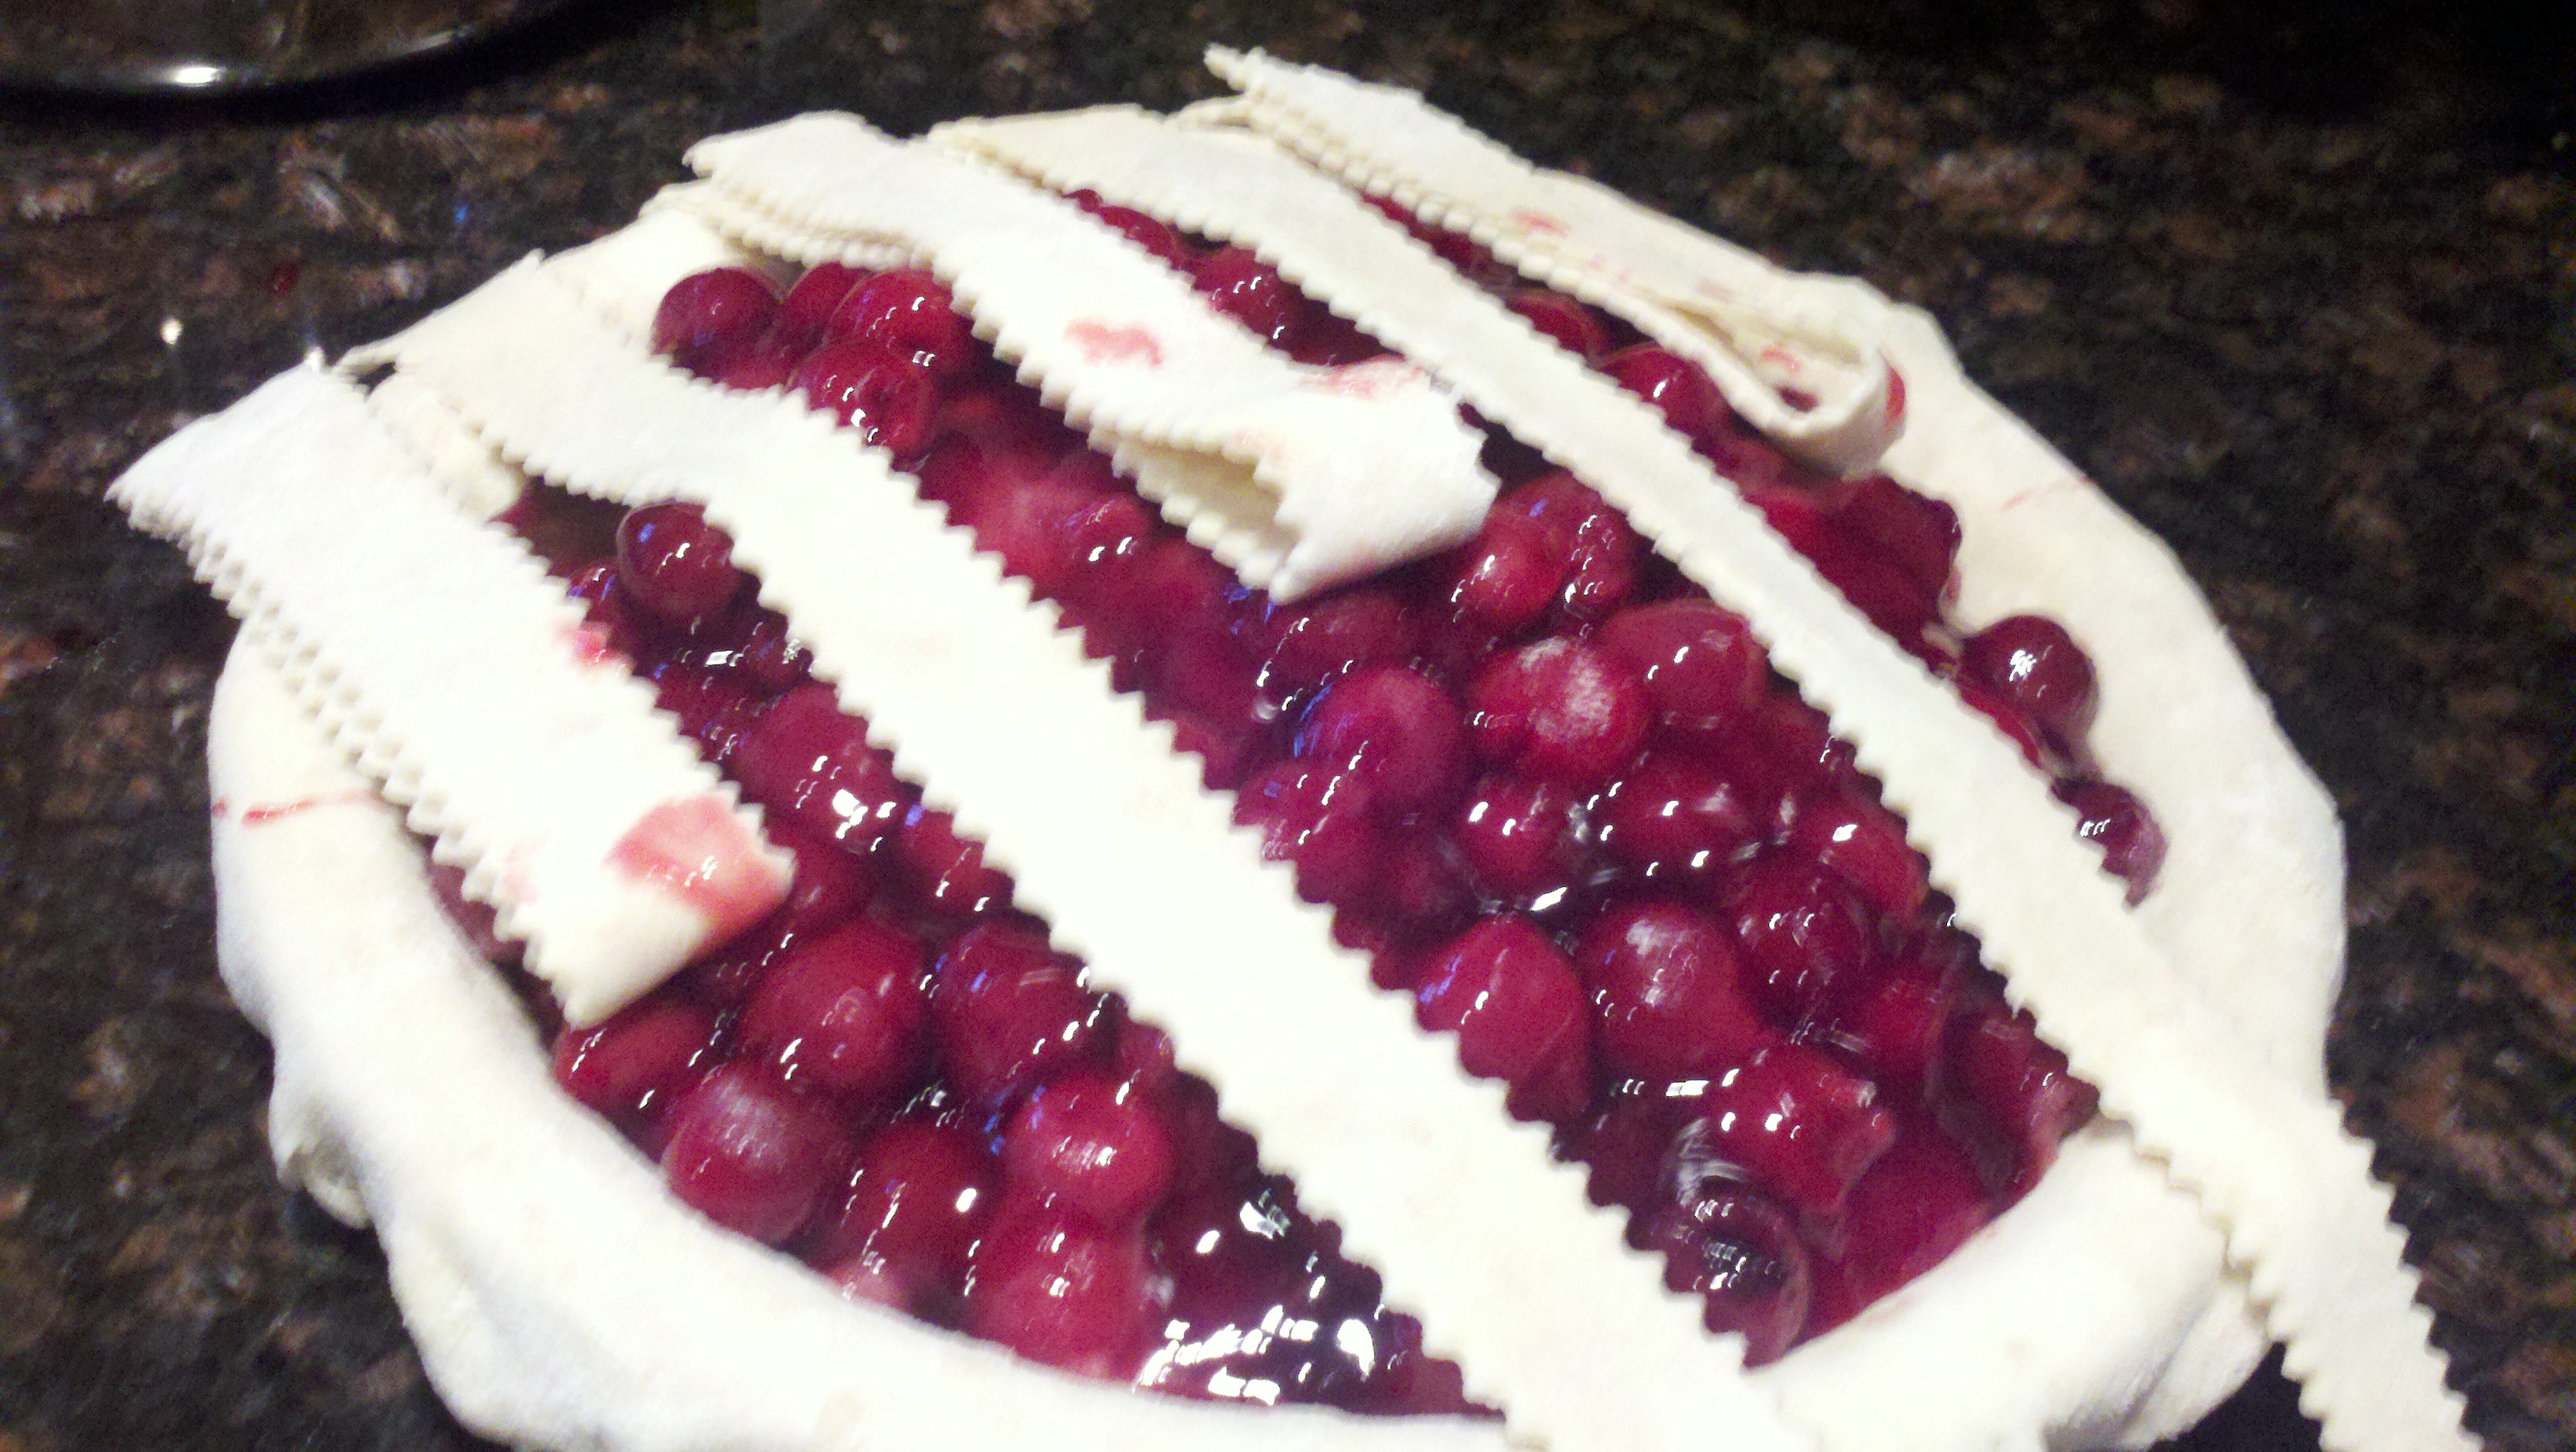
Lay the longest of your remaining strips across the pie at a diagonal.
Now replace the folded-back strips over that first long strip.
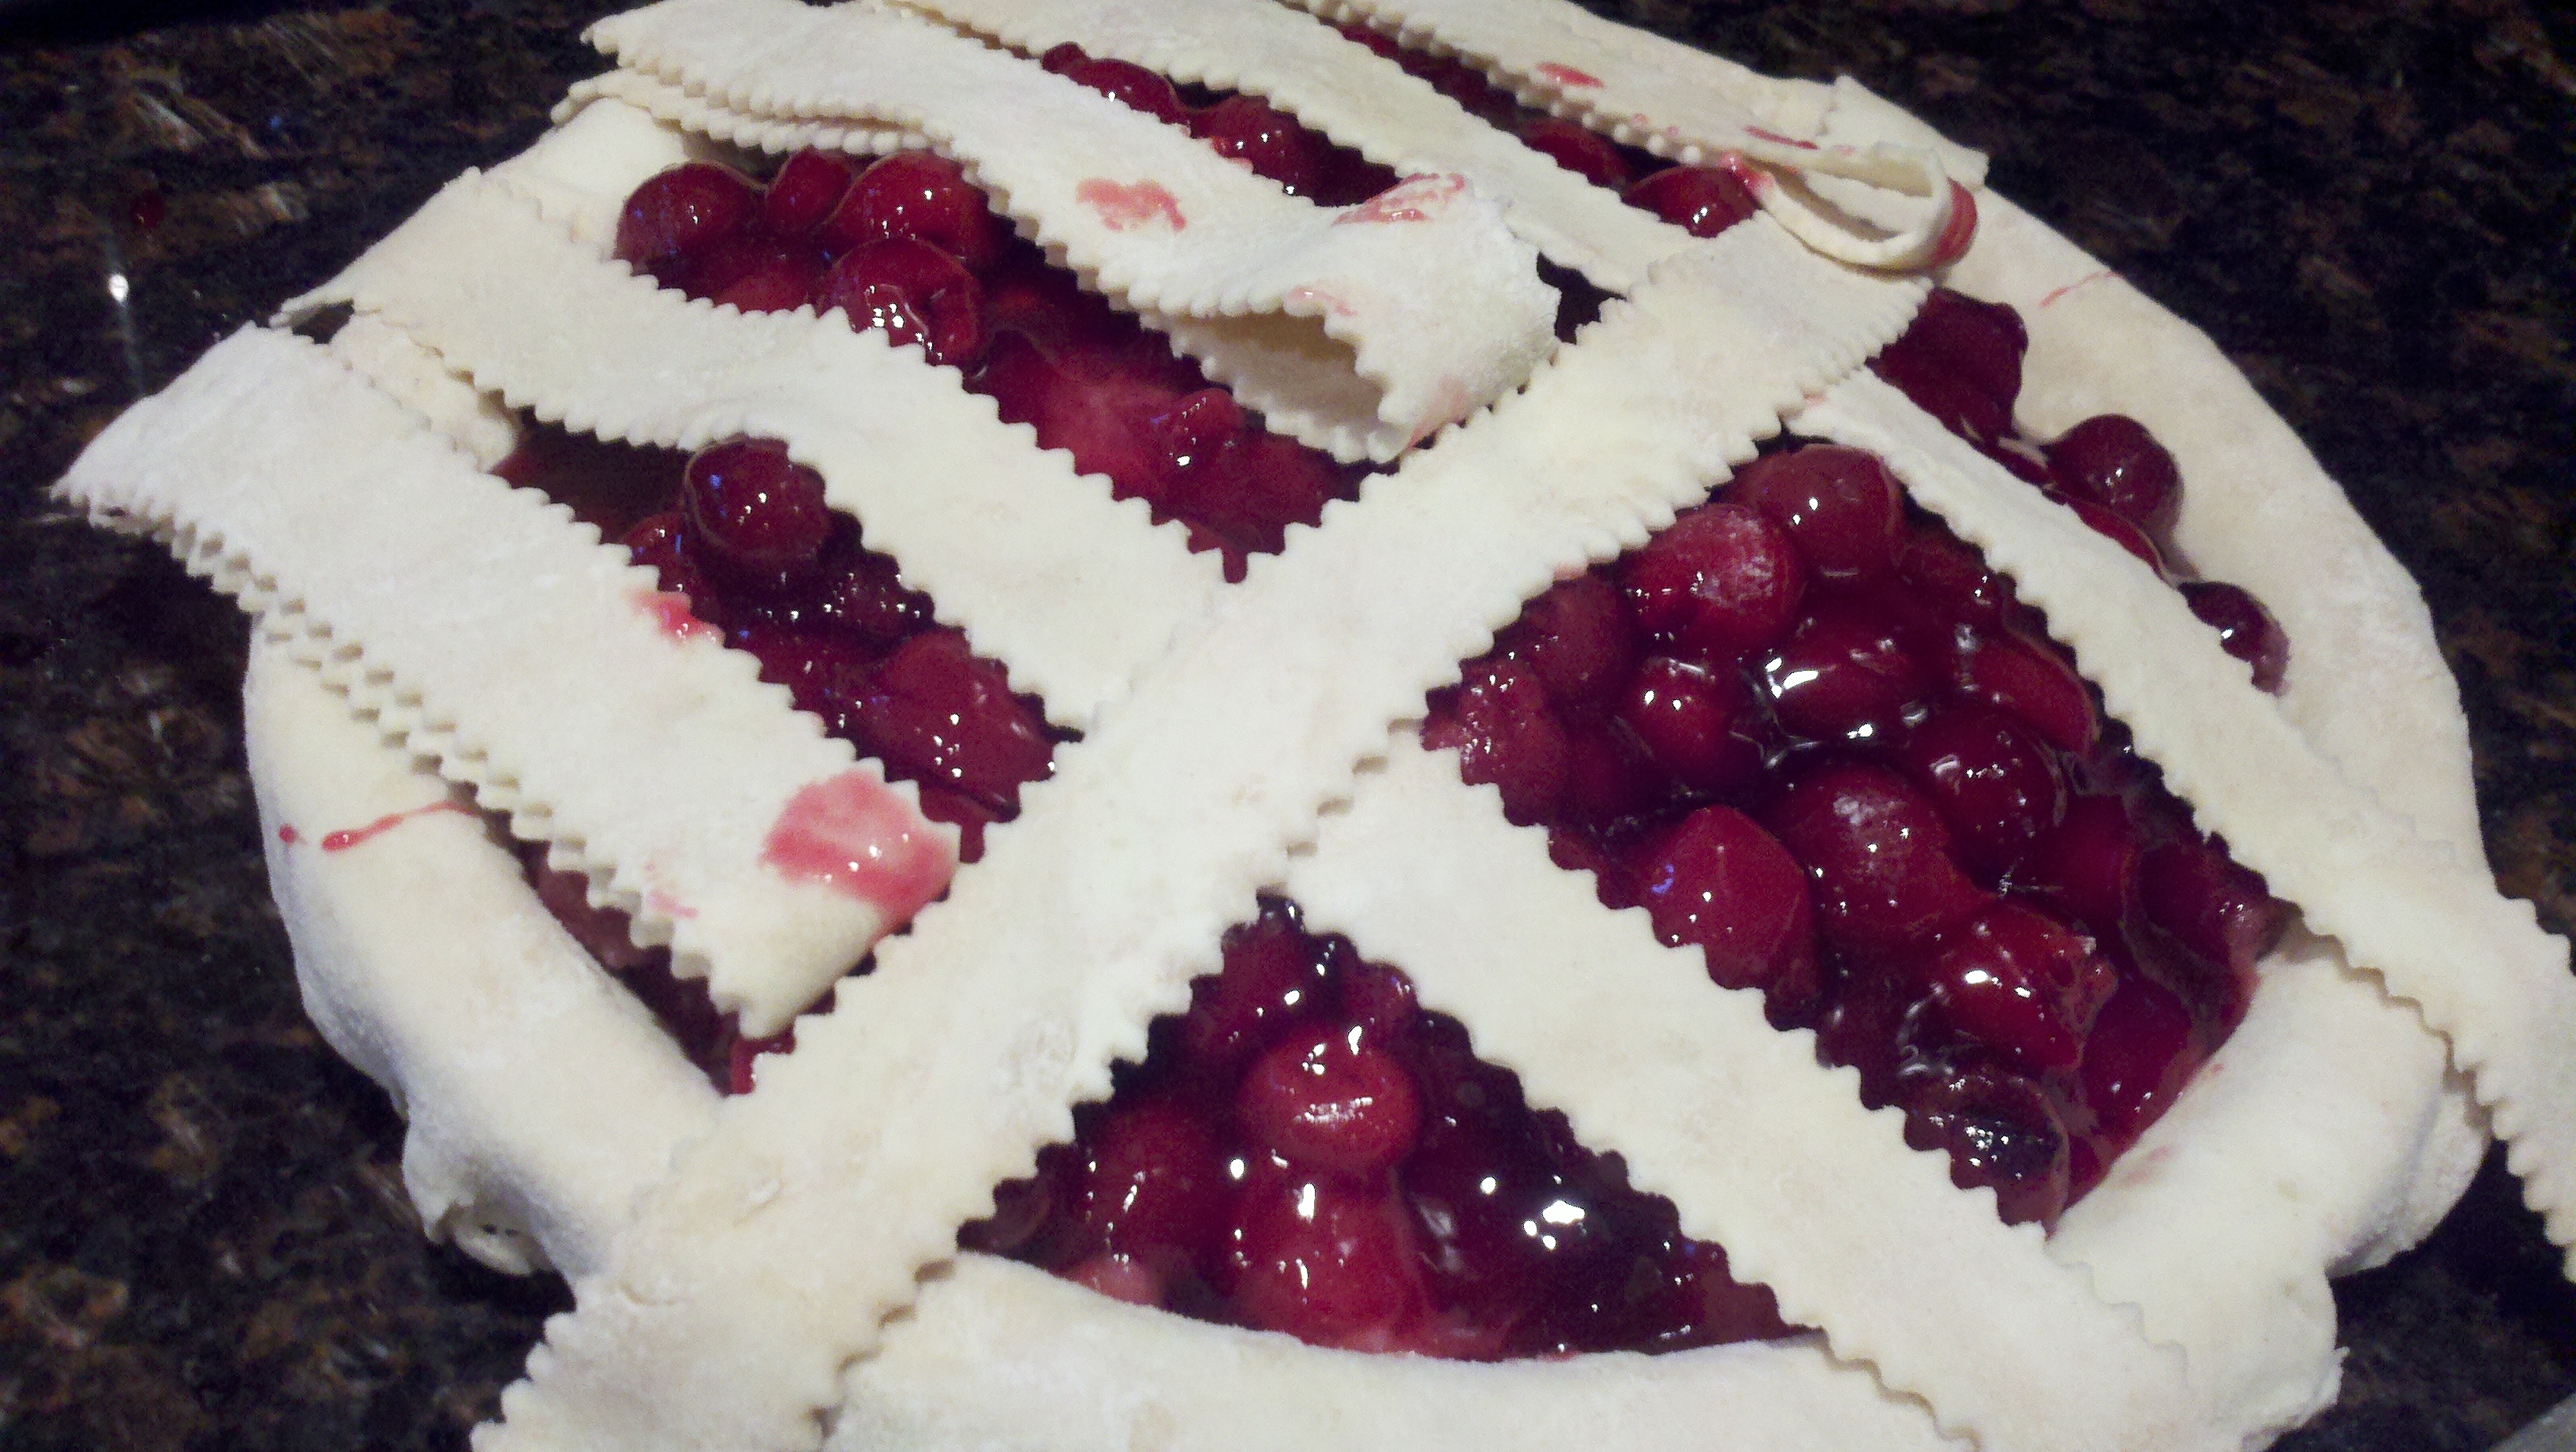
Fold back the dough strips that have not been folded back yet (set #2) and lay another long strip of dough on top, and replace set #2.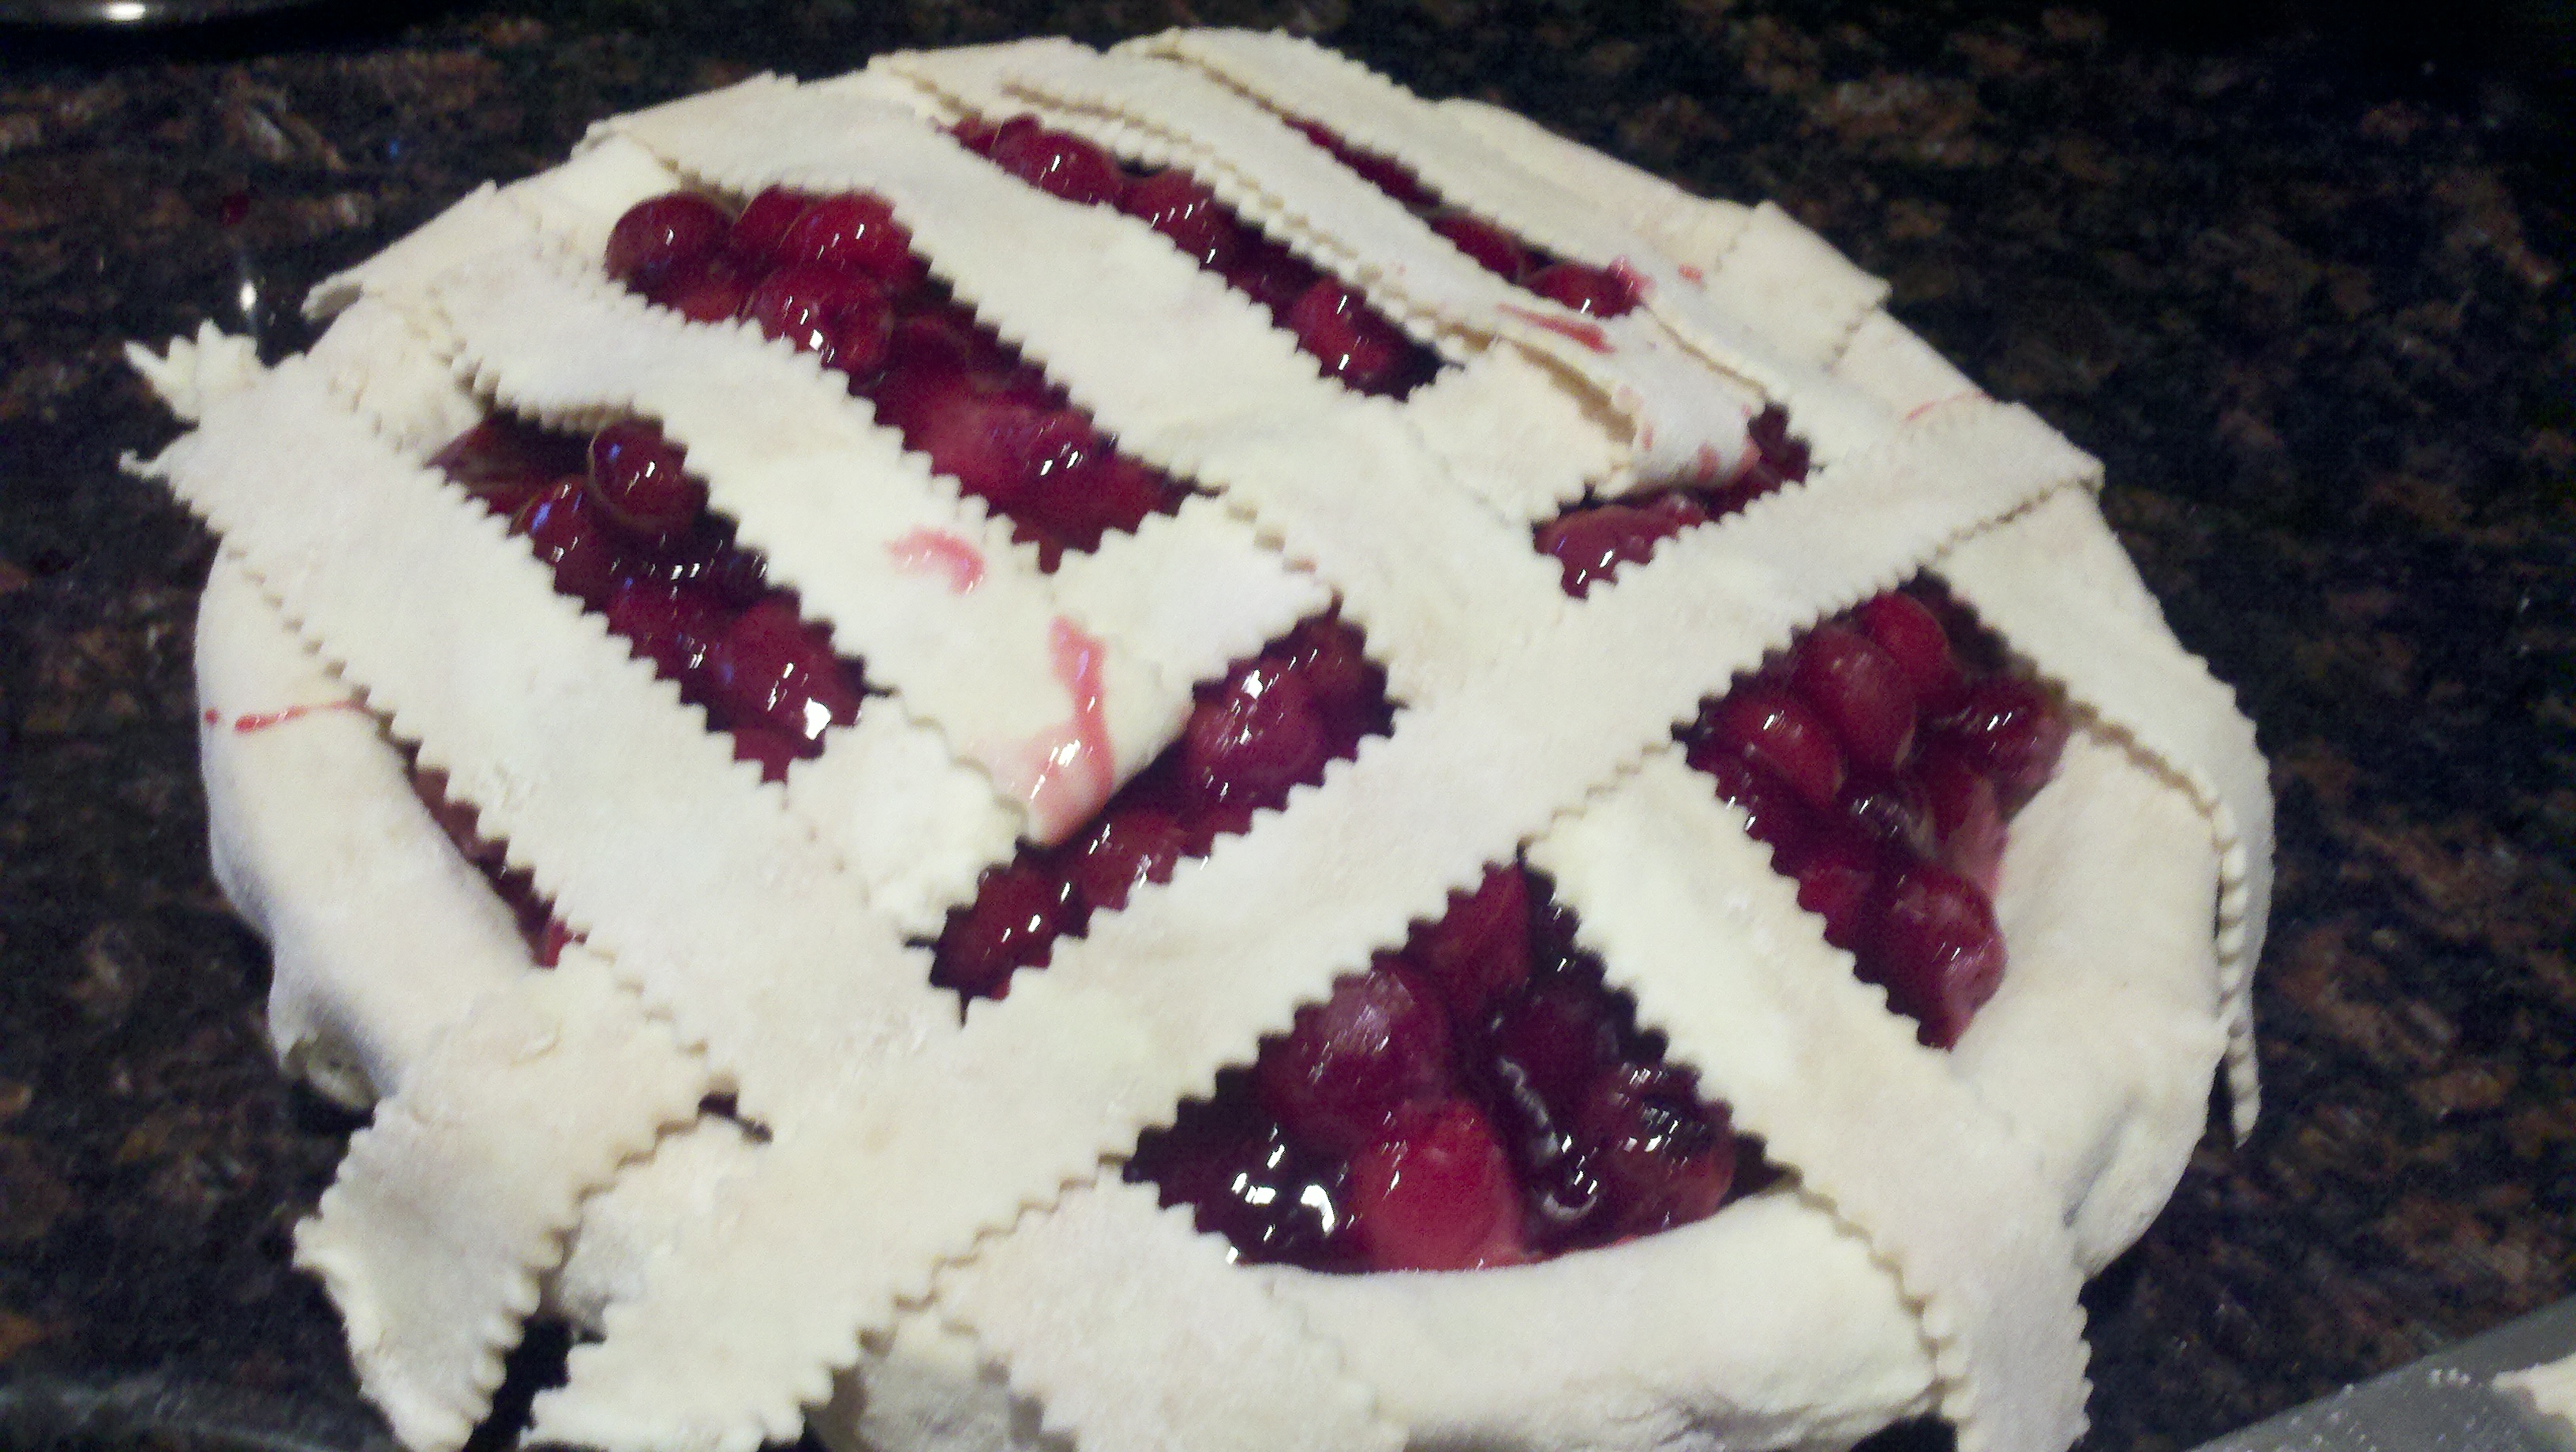
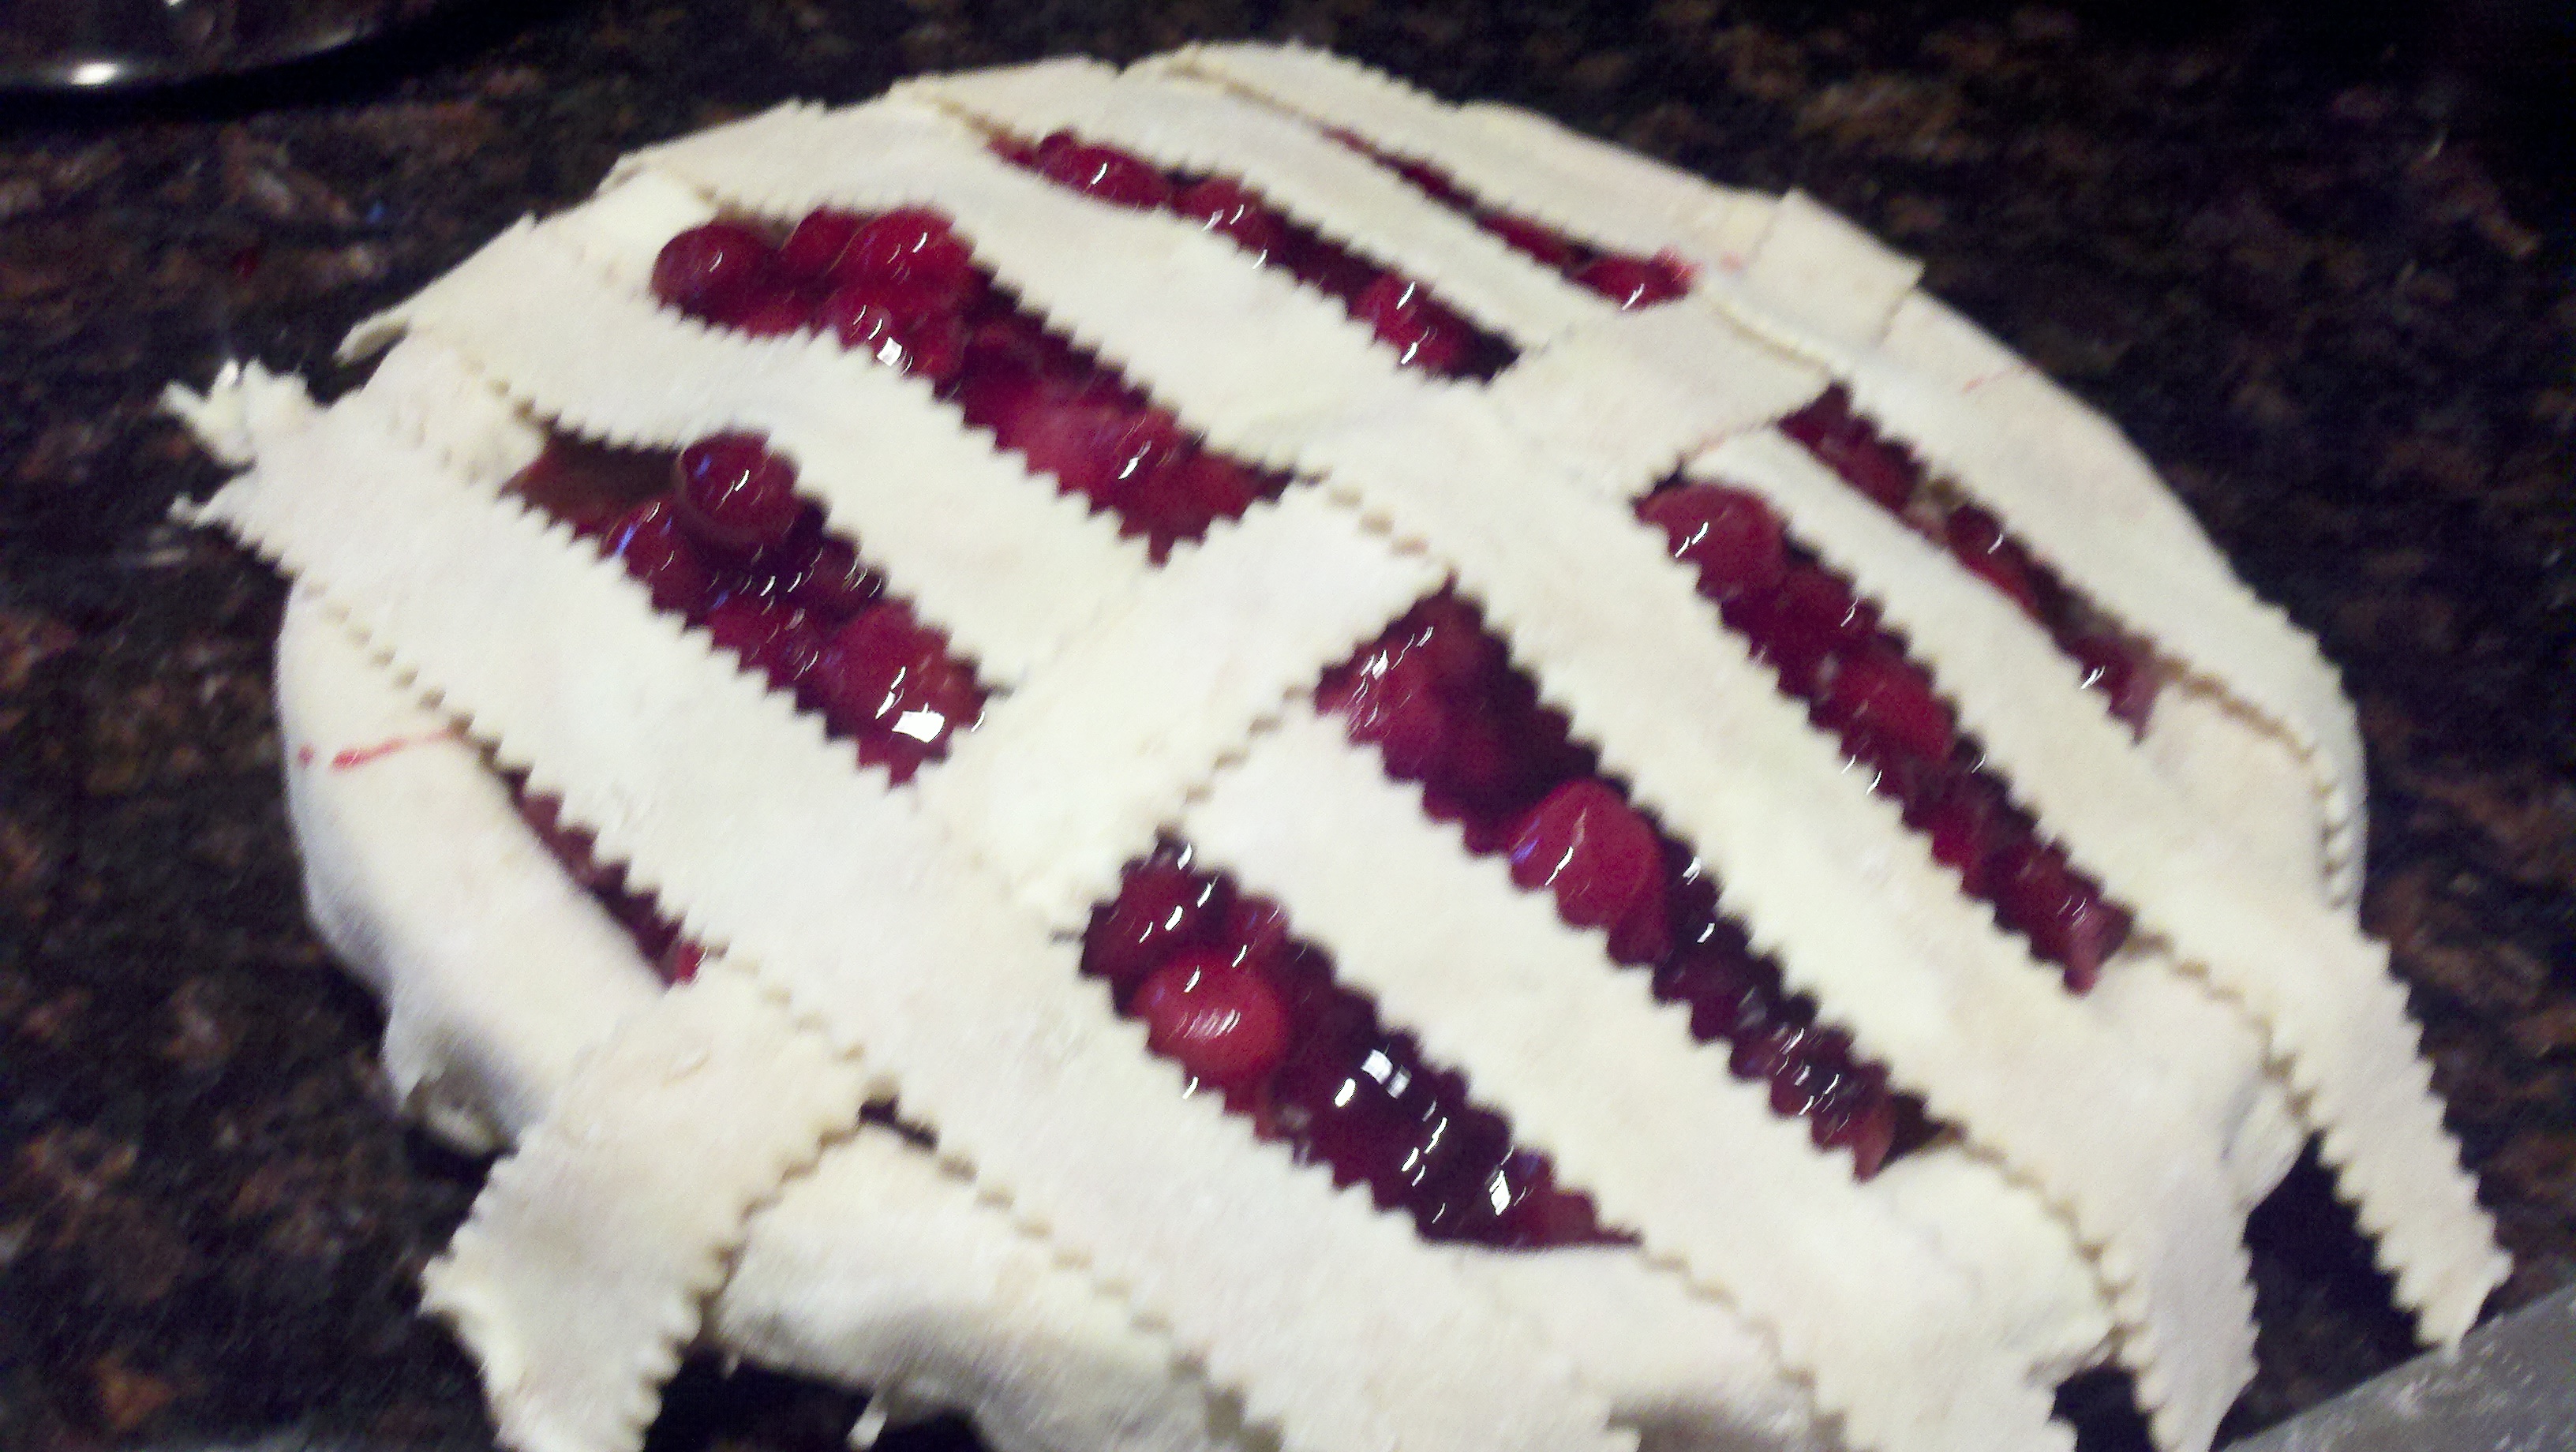
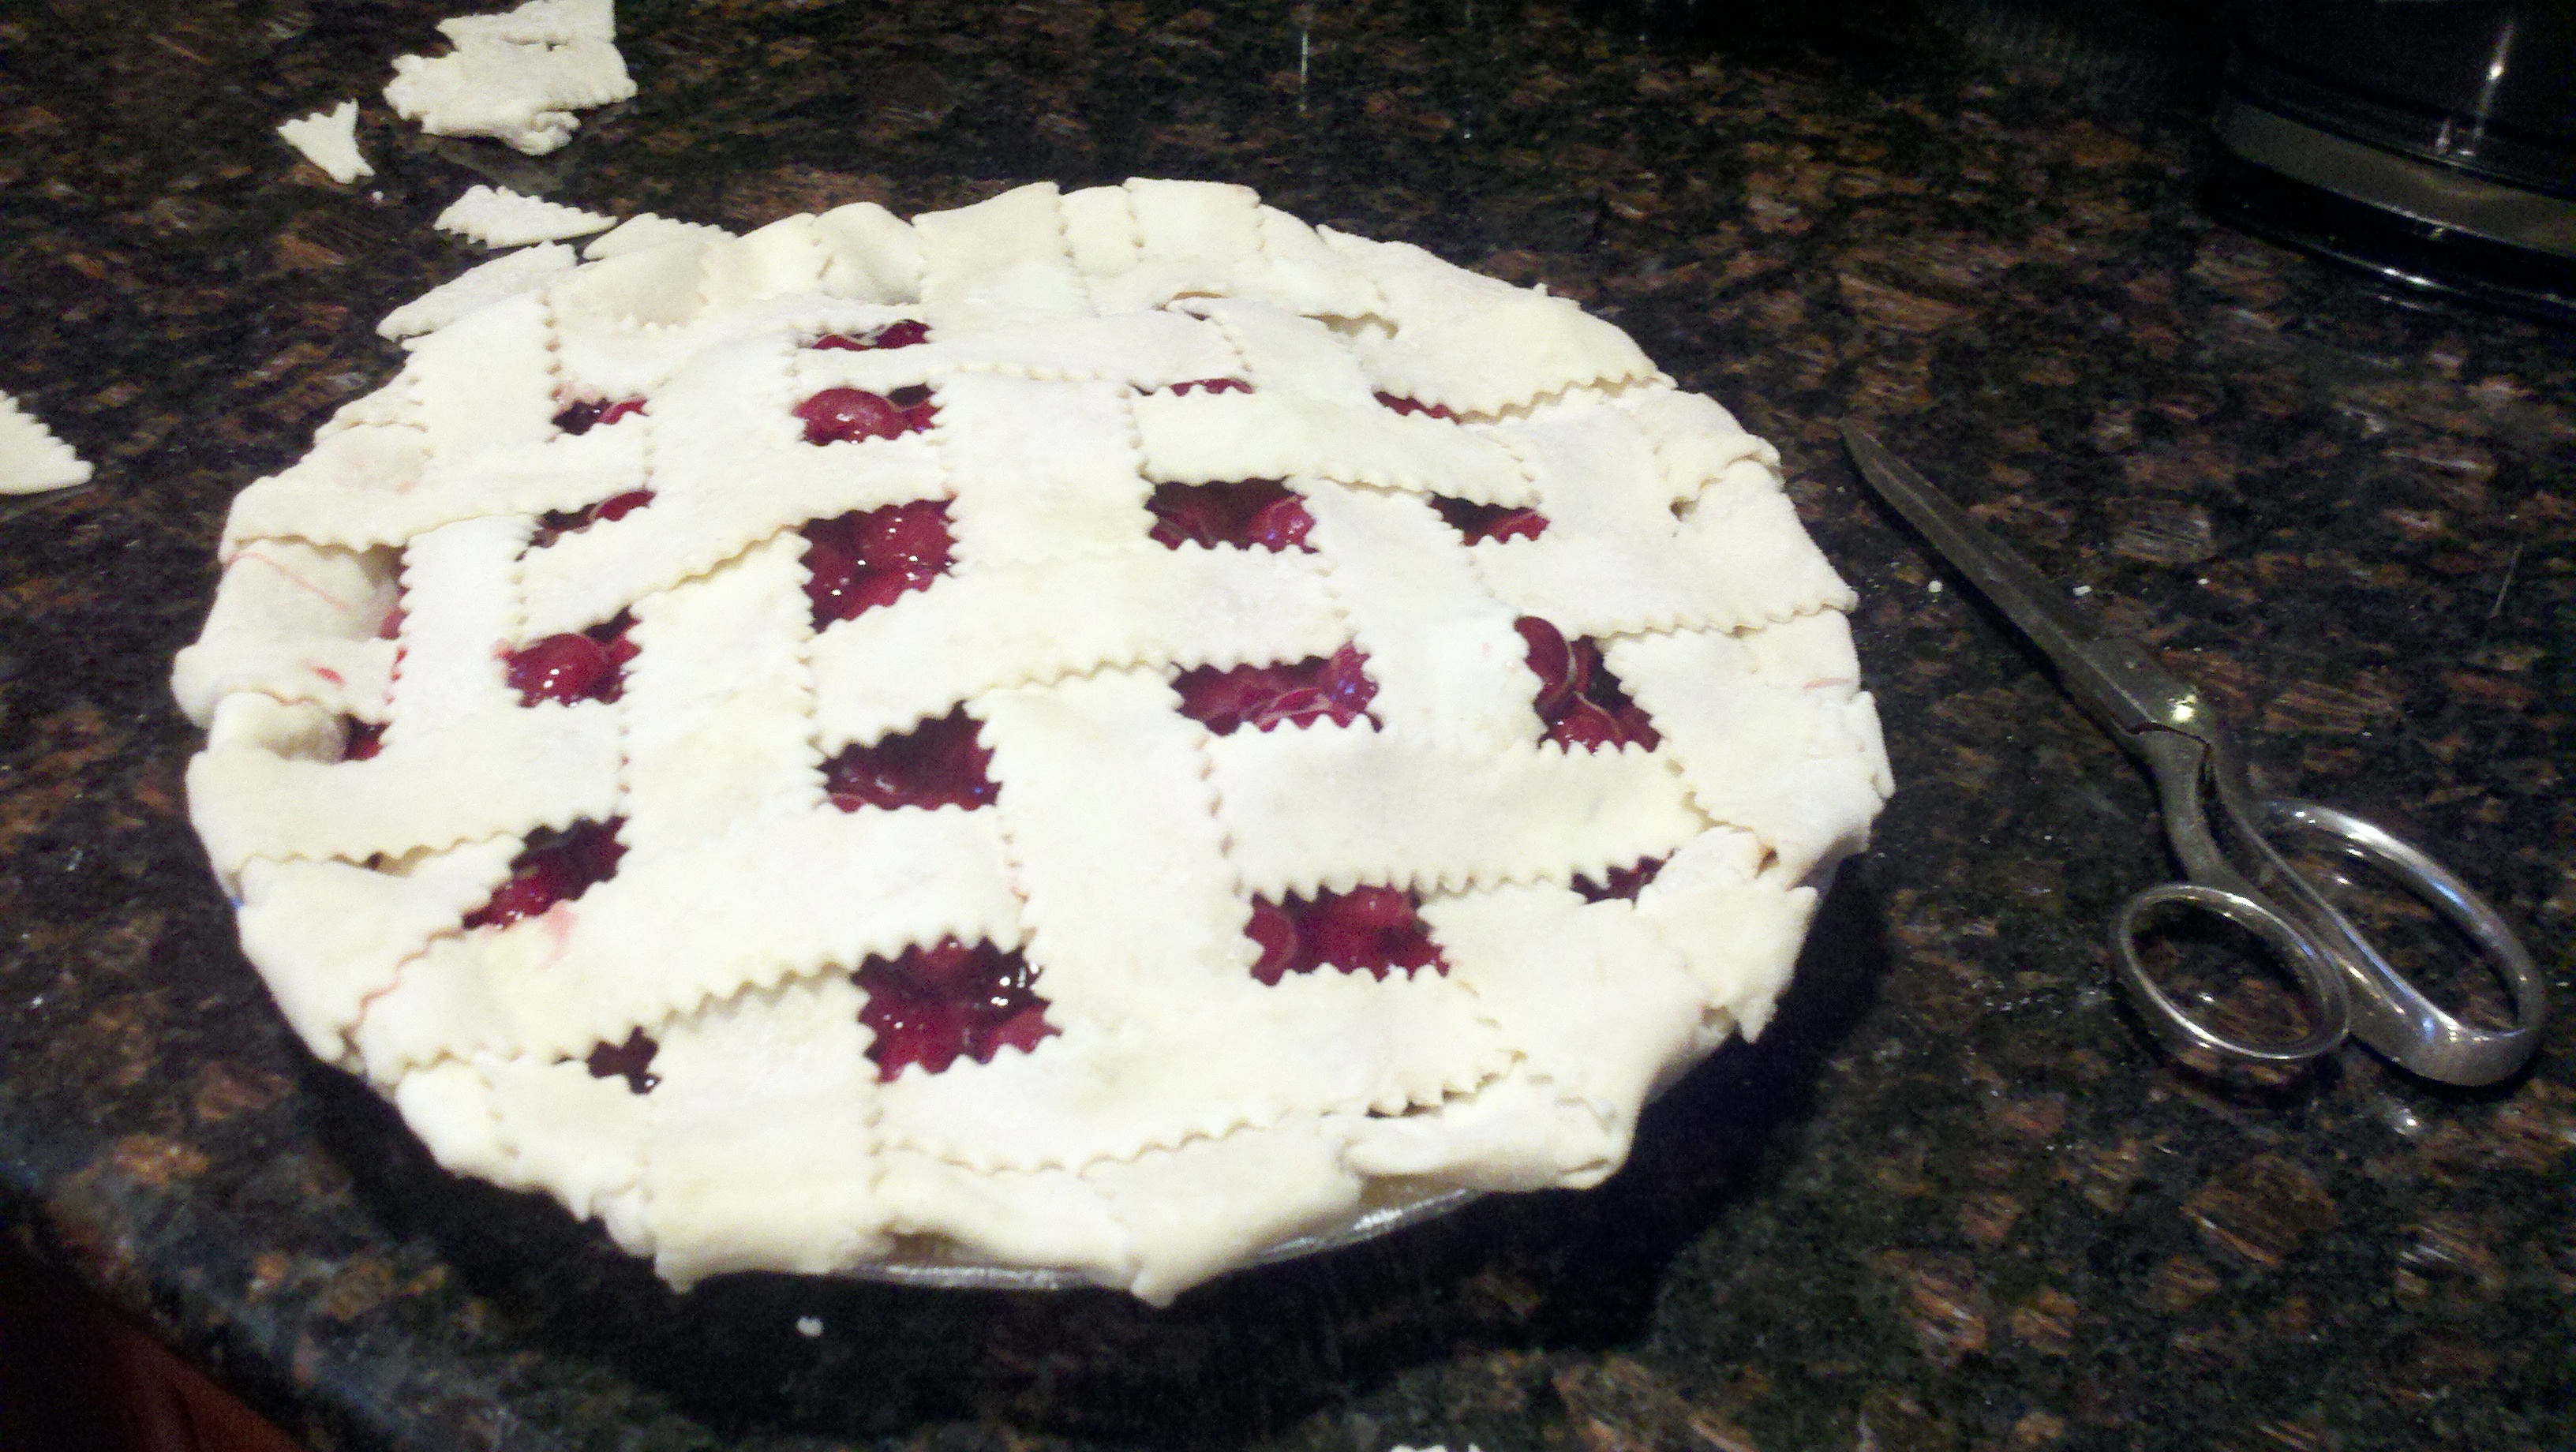
Continue this way until you’ve used all your dough strips and woven a lattice. (See? It looks much harder than it is.)
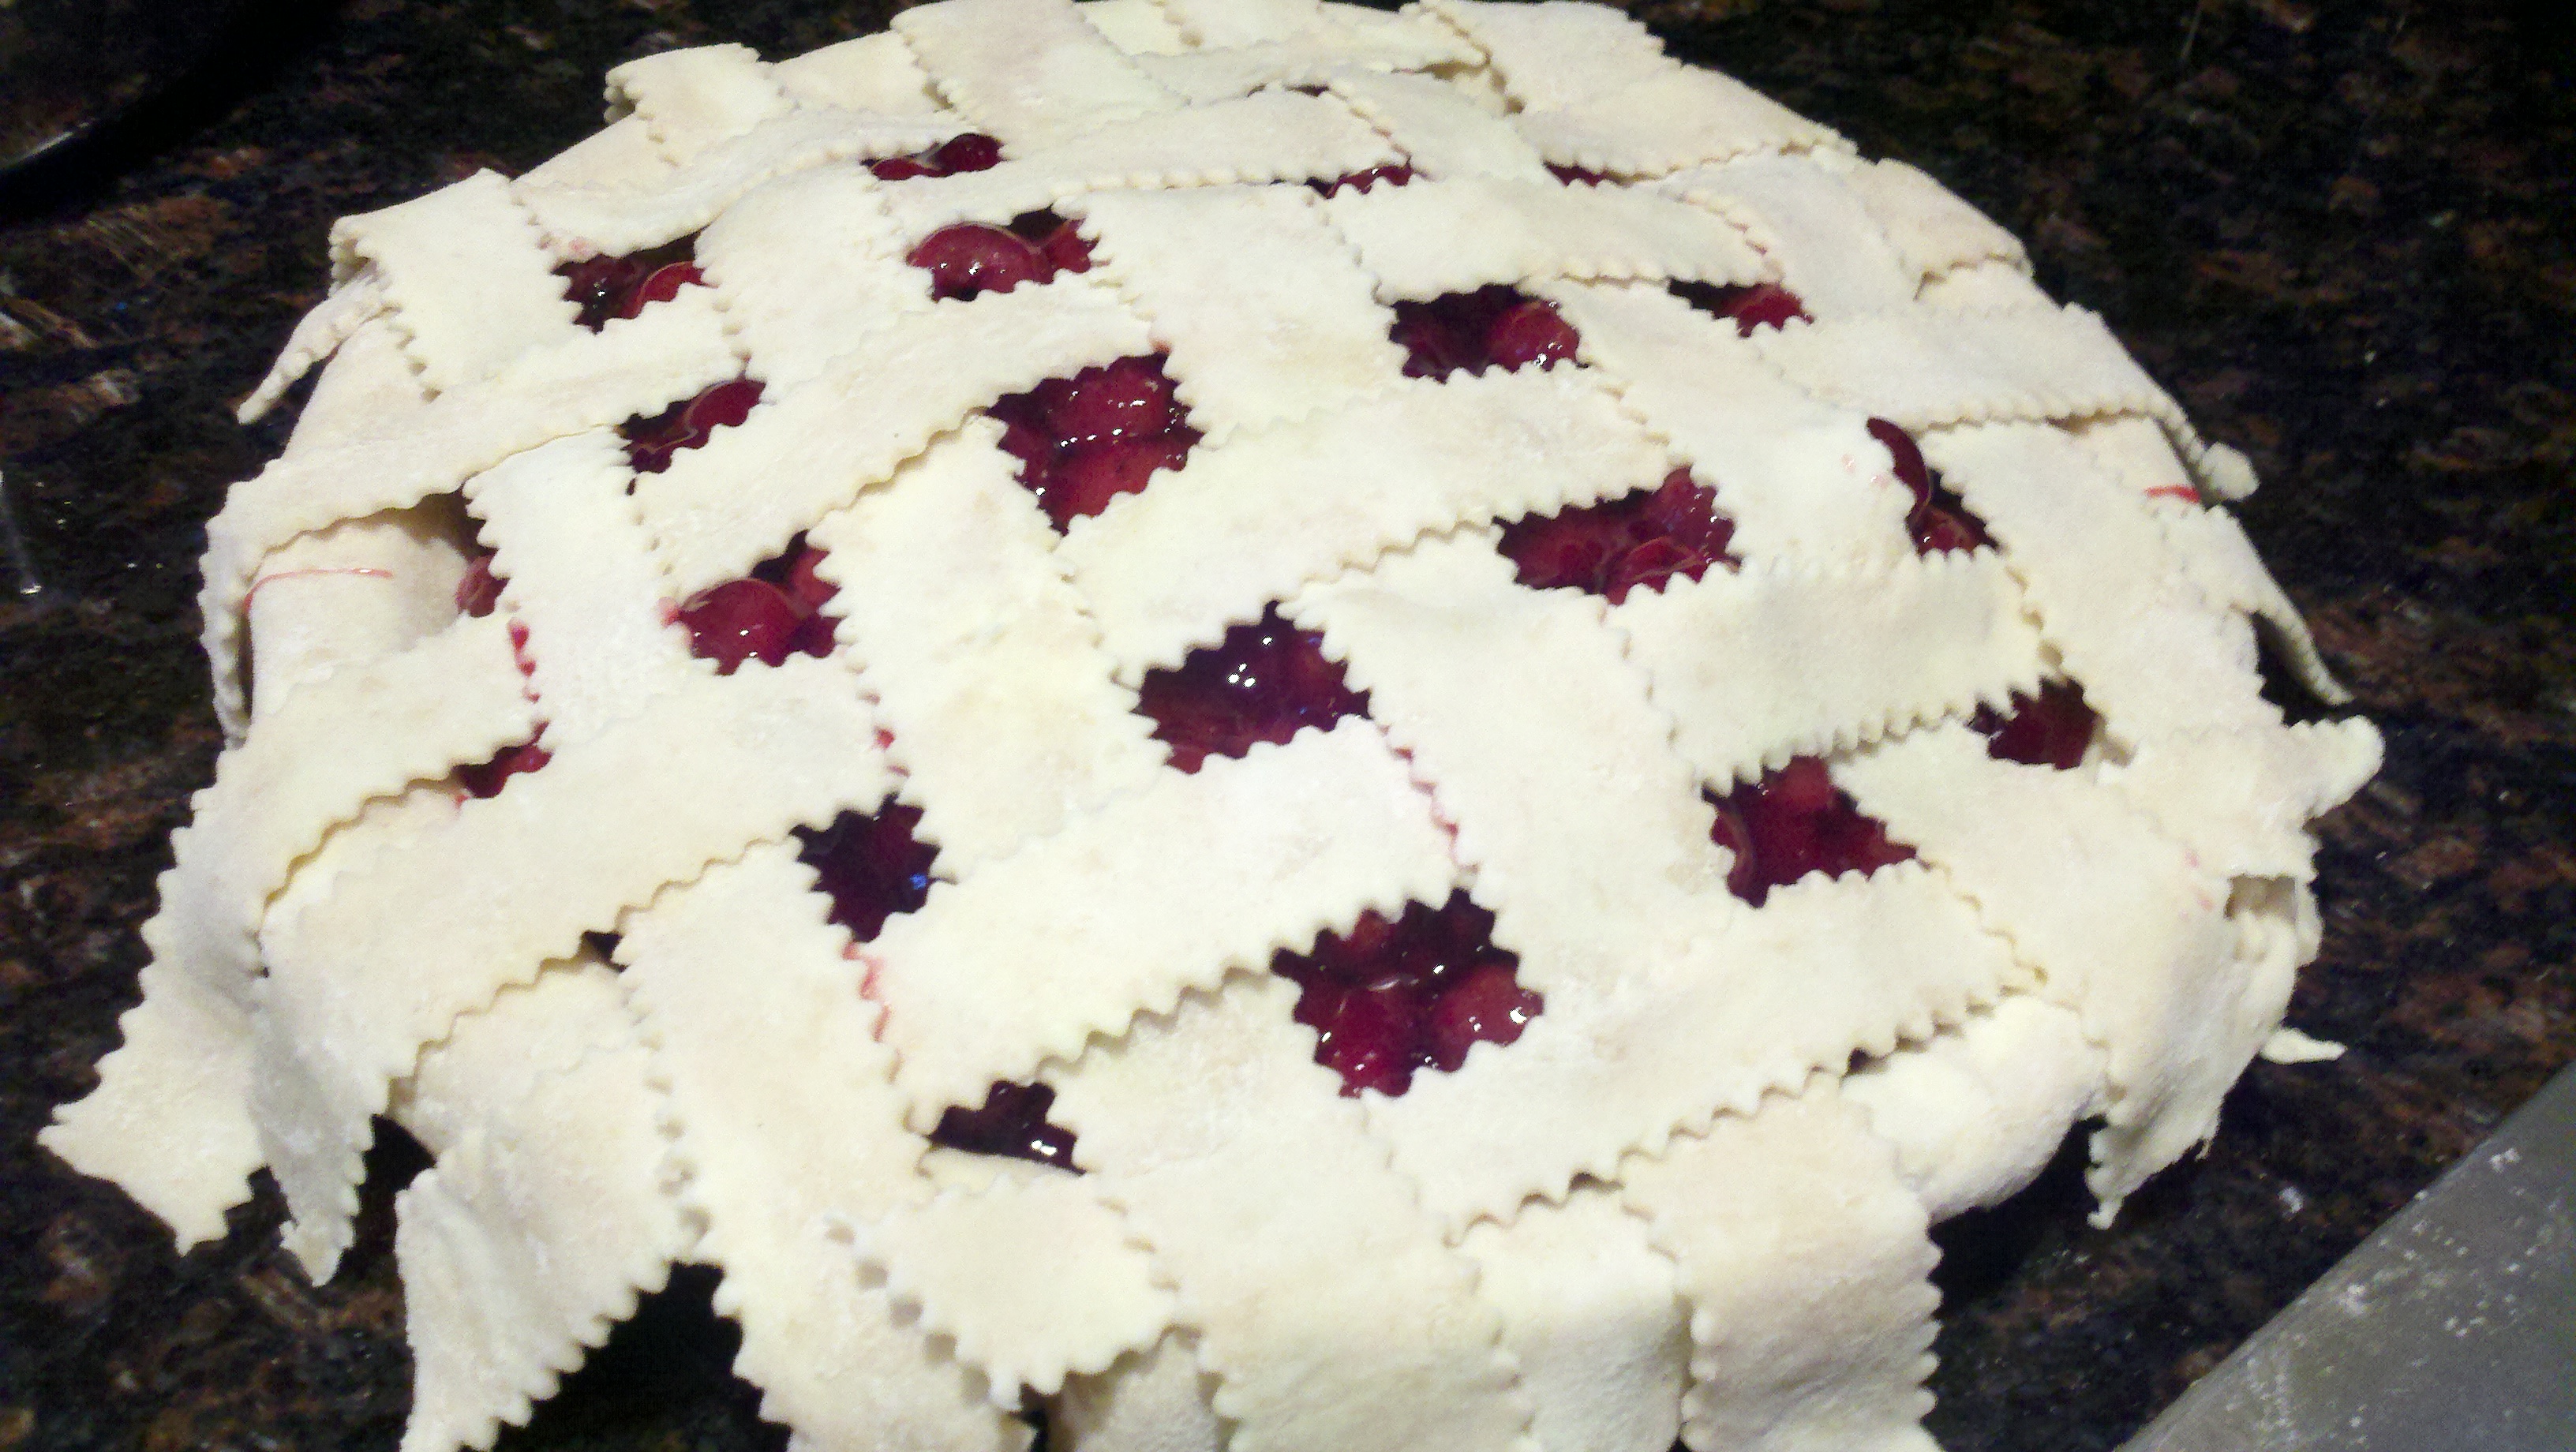
Trim the edges of your pie crust. Roll the edges under so you have a nice thick edge all around.
Chill the pie in the freezer for a full 20 minutes while the oven is preheating to 425.
Take it out and brush a thin coating of beaten egg white across the top and edges. Sprinkle liberally with sugar.
Bake the pie at 425 for 20 minutes. Turn the oven down to 375 and bake for another 45 minutes or so, turning it after about 20 minutes to ensure even baking. Bake until the pie is deep golden brown and you can see juices are bubbling thickly in the lattice openings.
Let cool completely to room temperature. This pie, like any fruit pie, is best left to set for at least 8 hours before serving.
CurvyMama Pies' Signature Tart Cherry Pie
Ingredients
Equipment
Method
- Place the well-drained cherries in a large bowl. Have the other filling ingredients nearby, but don’t add them yet.
- Roll out one disk of dough for your bottom crust. Ease it into a 9-inch pie pan and trim the edges. Put it in the refrigerator to chill.
- Roll out the second disk of dough for the top crust. If it's still nice and cold, use a fluted pastry wheel to cut into about 12 strips, each about ¾ inch wide. (If the dough has warmed up & softened a bit, chill it until it's firmer, and then cut.) Put the strips on a baking sheet in the refrigerator.
- Add the almond extract, sugar, salt and tapioca flour into the cherries, stirring briefly to combine.
- Take the bottom crust out of the refrigerator. Pour the cherry filling into the bottom crust.
- To weave the lattice top:
- Divide your dough strips in half, making sure that each set has long strips and shorter ones.
- Arrange set #1 in evenly spaced parallel lines across the fruit filling. Fold back every other strip. Take the longest of the remaining strips (set #2) and lay it across the pie at a diagonal.
- Replace the folded-back strips over this long strip.
- Now fold back the strips of set #1 that haven't been folded back yet. Lay down the next-longest of your set #2 strips, and unfold the folded ones on top of it.
- Continue in this way until all your strips have been used and your lattice is woven.
- Trim the edges of the pie all around. Finish the edges by folding the fluted strips under the rim of the bottom crust. Crimp lightly.
- Chill the pie in the freezer for 20 minutes while the oven is preheating to 425.
- Take the pie out of the freezer and brush a thin coating of beaten egg white across the top and edges. Sprinkle liberally with sugar.
- Bake at 425 for 20 minutes. Turn the oven down to 375 and bake for another 45 minutes or so, turning the pie after about 20 minutes to ensure even baking.
- Bake until the pie is deep golden brown and you can see juices are bubbling thickly in the lattice openings.
- Let cool completely to room temperature.
- This pie, like any fruit pie, is best left to set for at least 8 hours before serving.