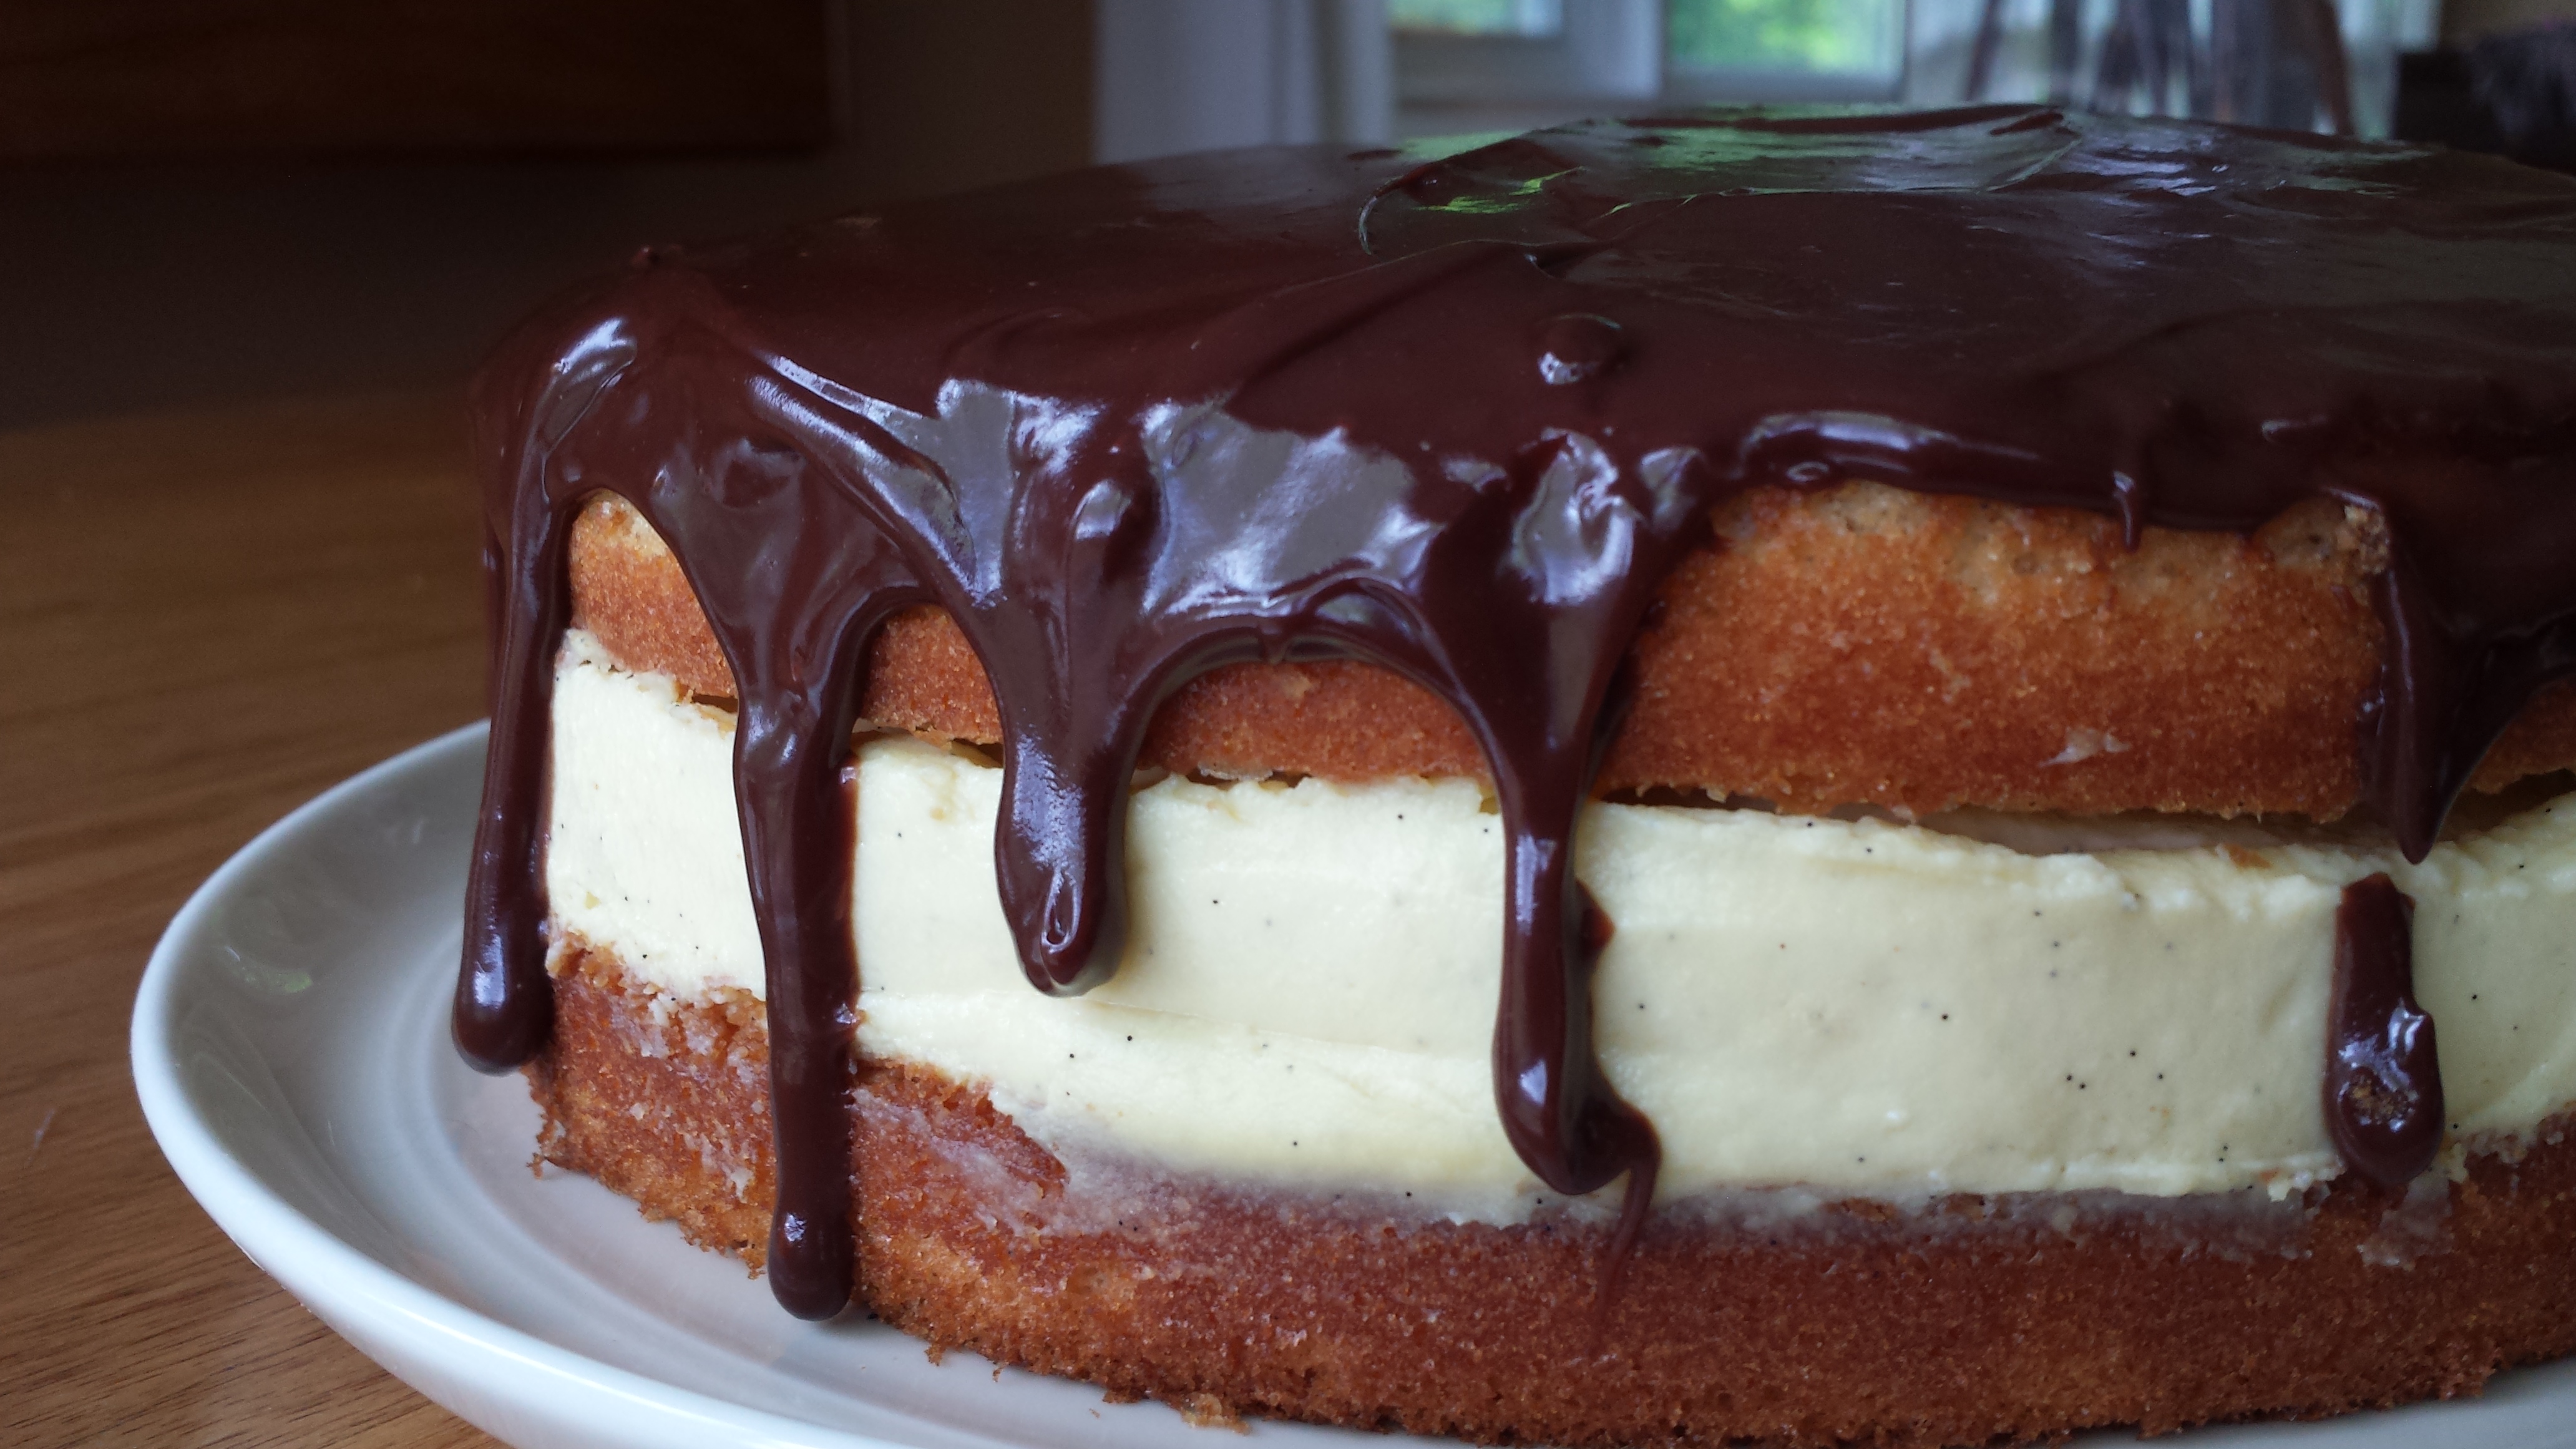
Let’s get this straight right up front: No one’s fooled by the name. We all know Boston Cream Pie isn’t a pie. But it’s so yummy in its creamy, cakey chocolatiness that we had to go ahead and add it to the CurvyMama lineup. We decided to give it credit for its heritage: We figure that any cake that was originally baked in pie tins is kin enough to join our little pie family.
Yes! Pie tins! When the Boston Cream Pie was created in 1856, at the Parker House hotel in Boston, the cakes were baked in pie pans! I learned this morsel of information by watching a video featuring the latest chef to carry on the tradition of the great confection: Gerard Tice of what’s now called the Omni Parker House hotel. Tice explains the cake’s history for you, and narrates as his assistant makes it.
The original recipe for Boston Cream Pie is no secret; it’s out there, with its layers of white and chocolate fondant and its rum-tinged pastry cream. But Cook’s Illustrated came along and decided, in its inimitable fashion, to improve on 150 years of Boston Cream Pie  history with a different technique for the golden sponge cake, a chocolate ganache as the glaze, and a polite “no” to the rum and to the original side coating of slivered almonds.
The version I offer you here is a slight variation of the Cook’s Illustrated recipe. (There’s a video that guides you through the making of the Cook’s Illustrated version, too.)
I use vanilla bean seeds in the custard rather than vanilla extract. I also tweaked the instructions here and there to reflect techniques that have worked well for me.
A quick word about the custard: If you, like I, might suffer from a bit of stubborn individuality, and maybe insist on using your own pastry cream recipe, be careful. On my first try with this cake, I made the custard that went with the Cook’s Illustrated recipe, which uses 6 egg yolks. It turns out quite firm. I thought I might like to try a slightly softer version, and since my pastry cream recipe uses only 4 yolks, I thought I’d give it a whirl.
Bad idea.
 The cake seemed stable enough when I pulled it out of the refrigerator after a night’s setting-up, and put the ganache on. It looked pretty lovely. I put it in my car to take it to work, and within 10 minutes, the cream had softened and gooshed out the sides, and the top layer of cake had slid to the side, bit by bit, until it came to rest at a horrifying angle against the edge of the plate.
I hastily rebuilt the cake once I got to work, hoping it would pull itself together in the refrigerator in time for an afternoon serving. Luckily, it did. It looked good, but as it turns out, it wasn’t up to the job of being eaten. Because when I sliced into the top layer of cake to serve it, the pastry cream gushed out the sides.
Trust me on this: the Cook’s Illustrated version of custard, with 6 egg yolks, works the best for this cake. It offers a custard firm enough to stand up to the slicing of the cake.
One other word of caution: If you’re feeling righteous enough to oppose corn syrup in your ganache, think again. You can certainly make a nice ganache without it. But the corn syrup gives it a sheen that really does right by the cake.
Without further adieu, I give you the Boston Cream Pie. Yes, it requires a bit of time. But the results are worth it. Enjoy!
CurvyMama Pies' Boston Cream Pie
Ingredients
Method
- Combine the half-and-half with the vanilla bean seeds in a medium saucepan over medium-high heat. Heat until the mixture it just begins to simmer. Don't let it boil.
- While it's heating, whisk together the yolks, sugar, and salt in a medium bowl until smooth. Add the flour to the yolk mixture and whisk until blended.
- Remove the half-and-half mixture from the heat and slowly drizzle about ½ cup of it into the yolks, whisking constantly. Slowly pour the tempered egg mixture back into the pan with the rest of the half-and-half, whisking constantly.
- Return the saucepan to medium heat and cook, whisking constantly, until the custard thickens slightly, about 1 minute. Reduce heat to medium-low and continue to simmer, whisking constantly, 4-5 minutes.
- Increase the heat to medium and cook, whisking vigorously, until bubbles burst on surface, 1 to 2 minutes.
- Remove the saucepan from the heat, and whisk in the butter until melted and blended. Press the pastry cream through a strainer set over a medium bowl. Press plastic wrap directly on the surface of the custard and refrigerate until set. This will probably take several hours.
- Preheat oven to 325 degrees. Lightly grease two 9-inch round cake pans and line the bottoms with circles of parchment.
- Whisk the flour, baking powder and salt together in a medium bowl. Heat the milk and butter in a small saucepan over low heat until the butter is melted. Remove from the heat, add the vanilla, and cover to keep warm.
- In a stand mixer with the whisk attachment, whip the eggs and sugar on high speed until light. Remove the mixer bowl from stand. Add the hot milk mixture and whisk by hand until blended. Add the dry ingredients and whisk until blended.
- Immediately divide the batter evenly between the two prepared pans. Bake until the tops of the cakes are light brown and a toothpick inserted in the center comes out clean, 20 to 22 minutes.
- Transfer the cakes to a wire rack to cool completely in the pans.
- Run a small plastic knife around the edge of the pans, and invert cakes onto the wire rack. Peel off the parchment and re-invert the cakes.
- To assemble the Boston Cream Pie, place one cake on a serving plate. Whisk the pastry cream briefly to soften, then spoon it onto the center of the cake. With an offset spatula, spread the custard evenly to the edges of the cake. Put the second layer of cake on top of the custard, bottom side up, making sure the layers line up properly. Press lightly on the top of the cake to level it. Refrigerate until the ganache is ready.
- In a small saucepan, blend the cream and corn syrup together and bring to a simmer over medium heat. Remove from heat and add chocolate. Whisk gently until smooth. Transfer to small bowl and let stand, whisking occasionally, until it's thickened enough to hold a very soft "piled up" shape. If it's not thick enough to do that, the ganache will run too far down the sides of the cake instead of stopping, tantalizingly, part of the way down.
- Pour the ganache onto the center of the cake. With an offset spatula, spread it to the edge of cake, pushing just enough over the sides to form overflow in a few places.
- Chill the finished the cake at least a few hours before slicing. The cake may be made as long as 24 hours before serving.
Notes
